This feature integrates your Google or Outlook calendar, lets you set availability (e.g., Monday, Wednesday, and Friday, 5-7 PM), and create session packages. Users can view and book your available slots, which are then blocked off on your calendar, with both parties receiving a calendar invite.
We will go over 3 steps:
1. Create private session prices and packages
2. Integrate your calendar and set availability
3. Make your private session live for people to book
Create private session prices and packages
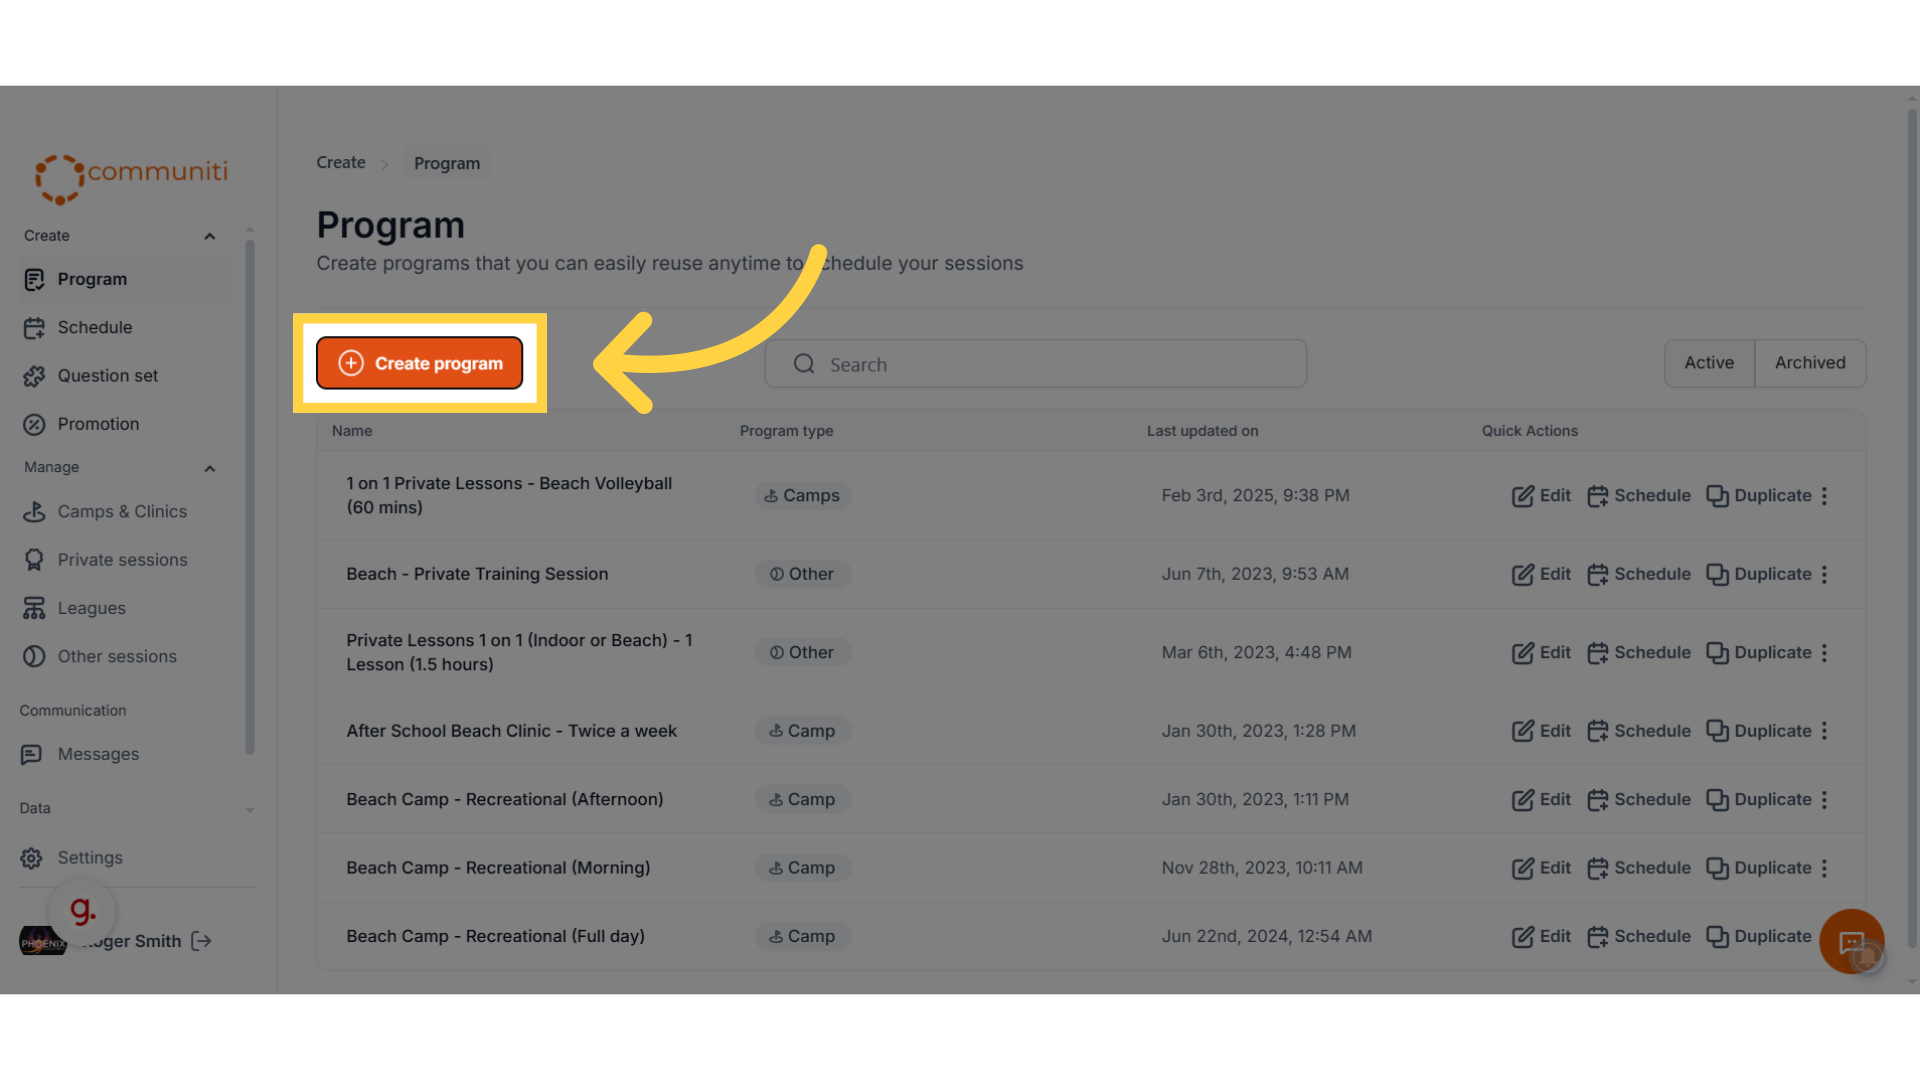
1. Click "Create program"
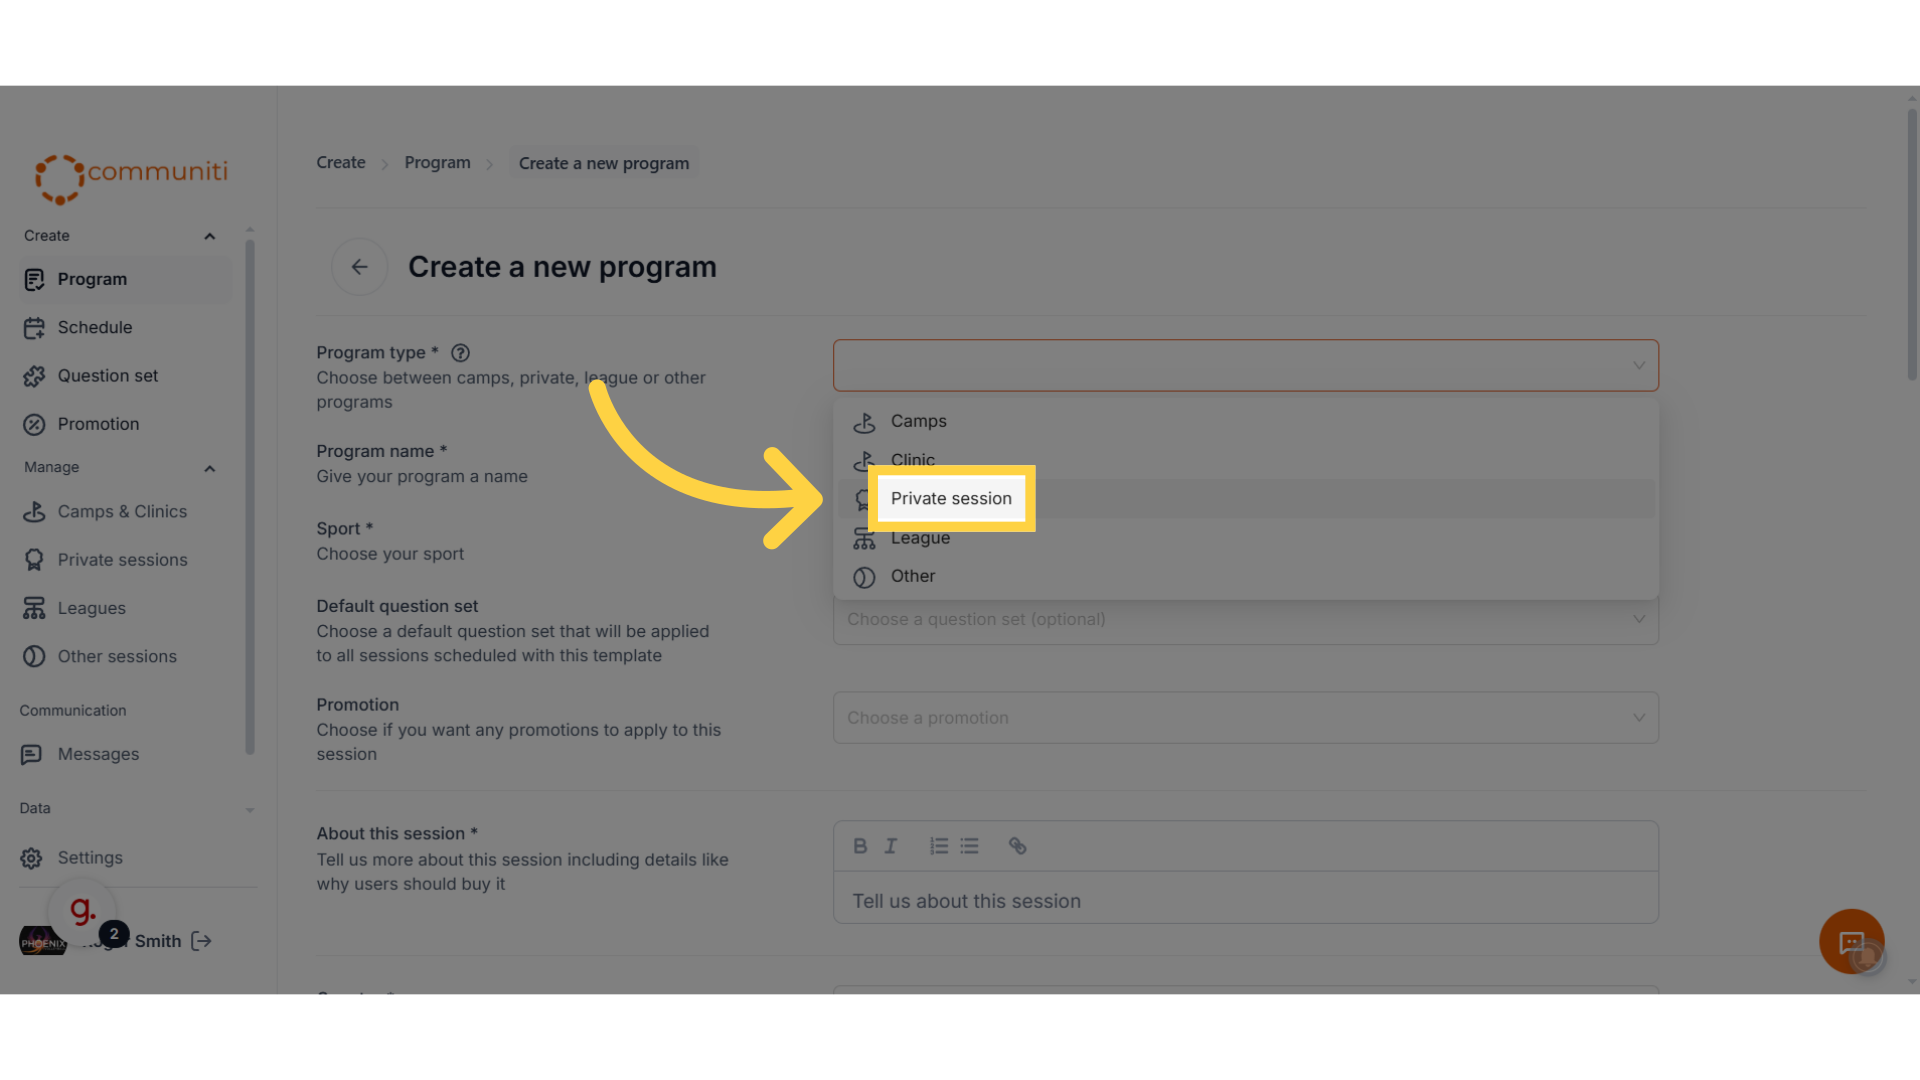
2. Select the Program type as "Private session"
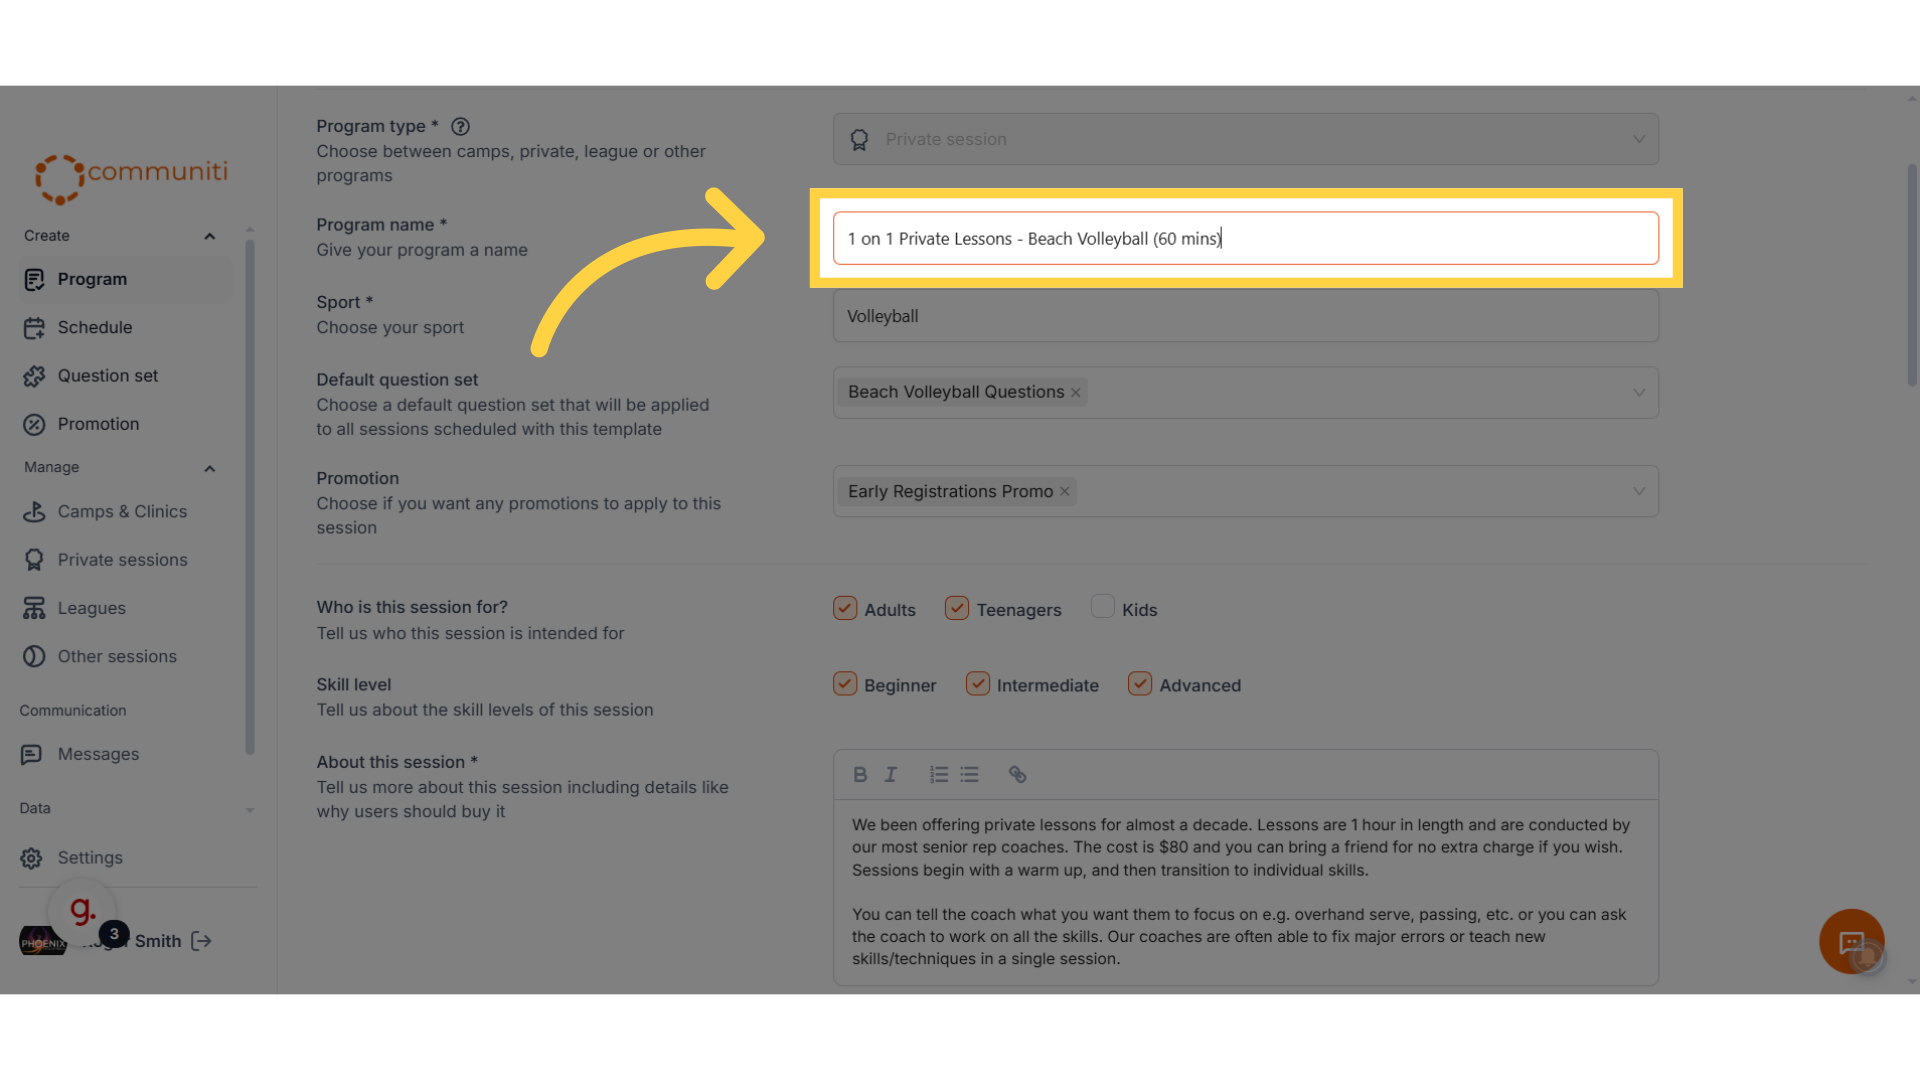
3. Provide a name for the session
Fill in the other sections on the page
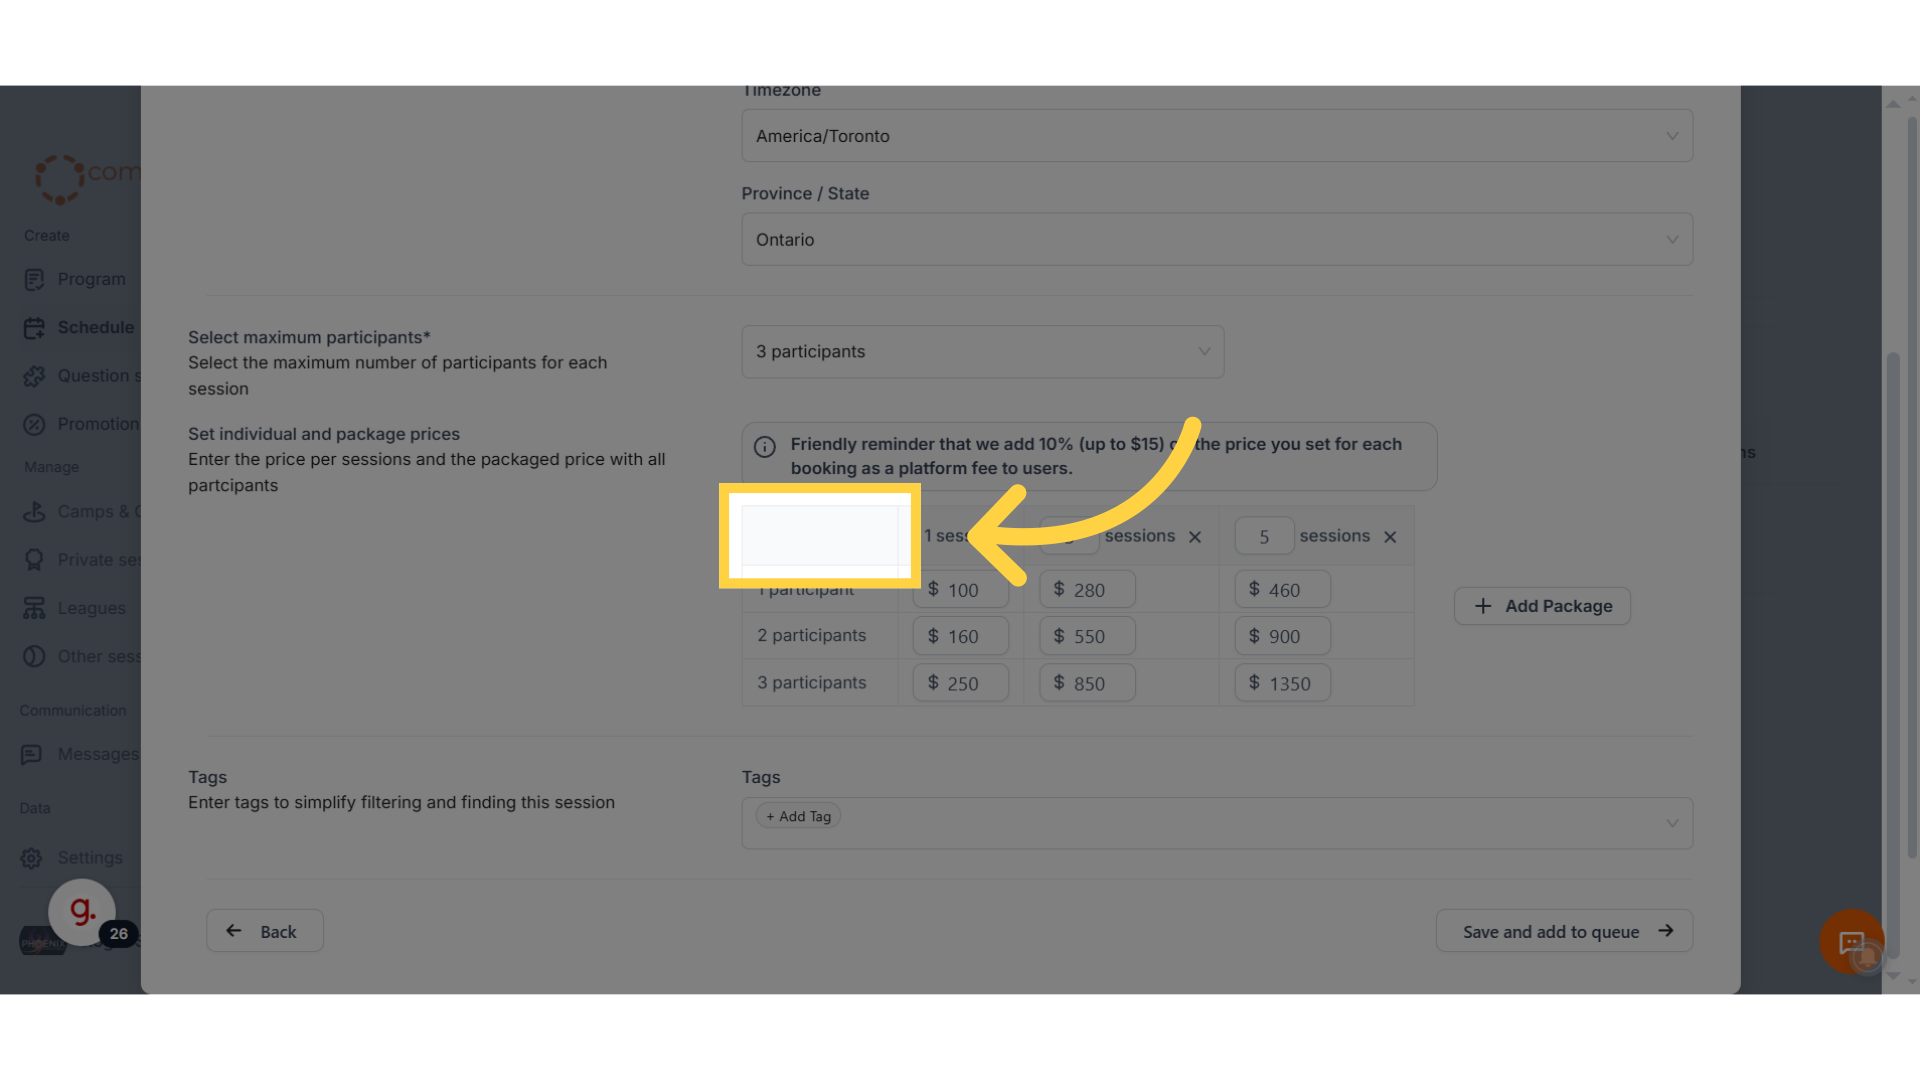
4. Select the maximum number of participants you want in each session
If it is 1 on 1 session, then select 1. If is a small group session then select a larger number (ex. 3)
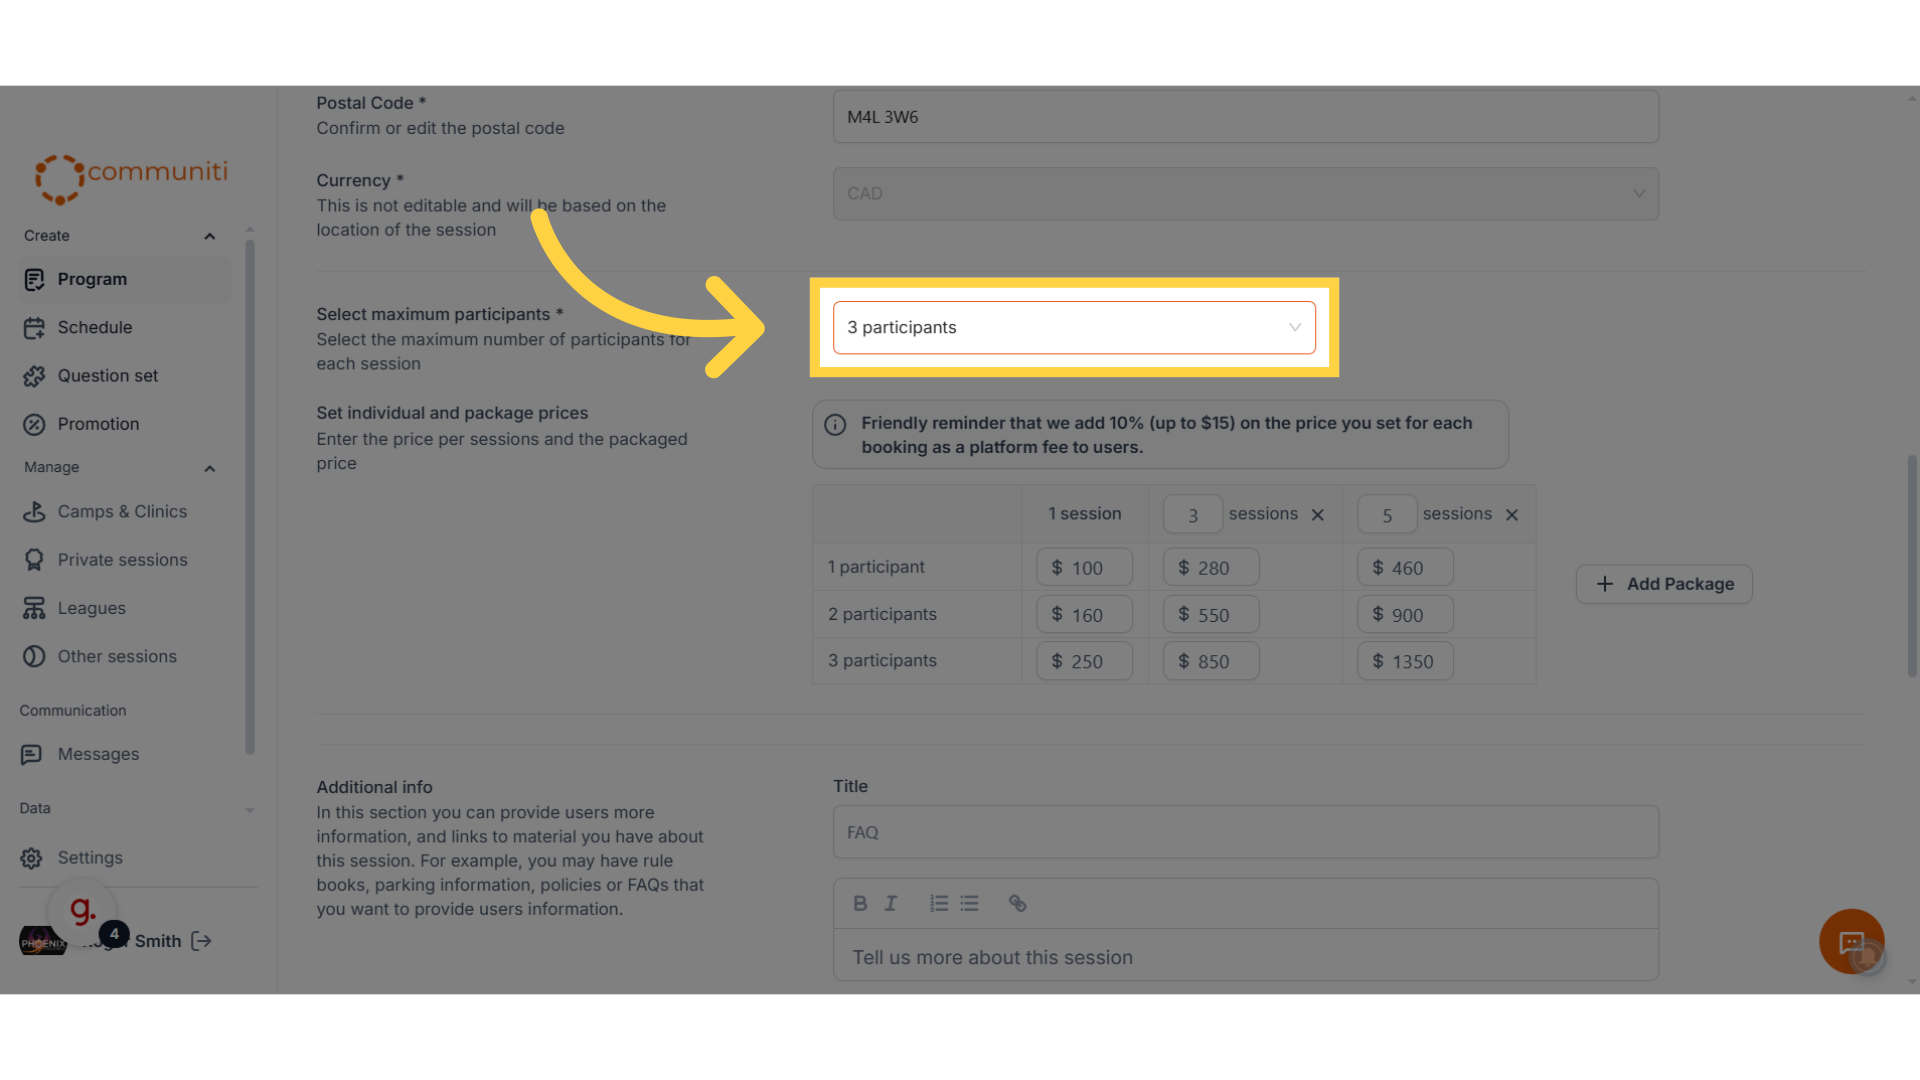
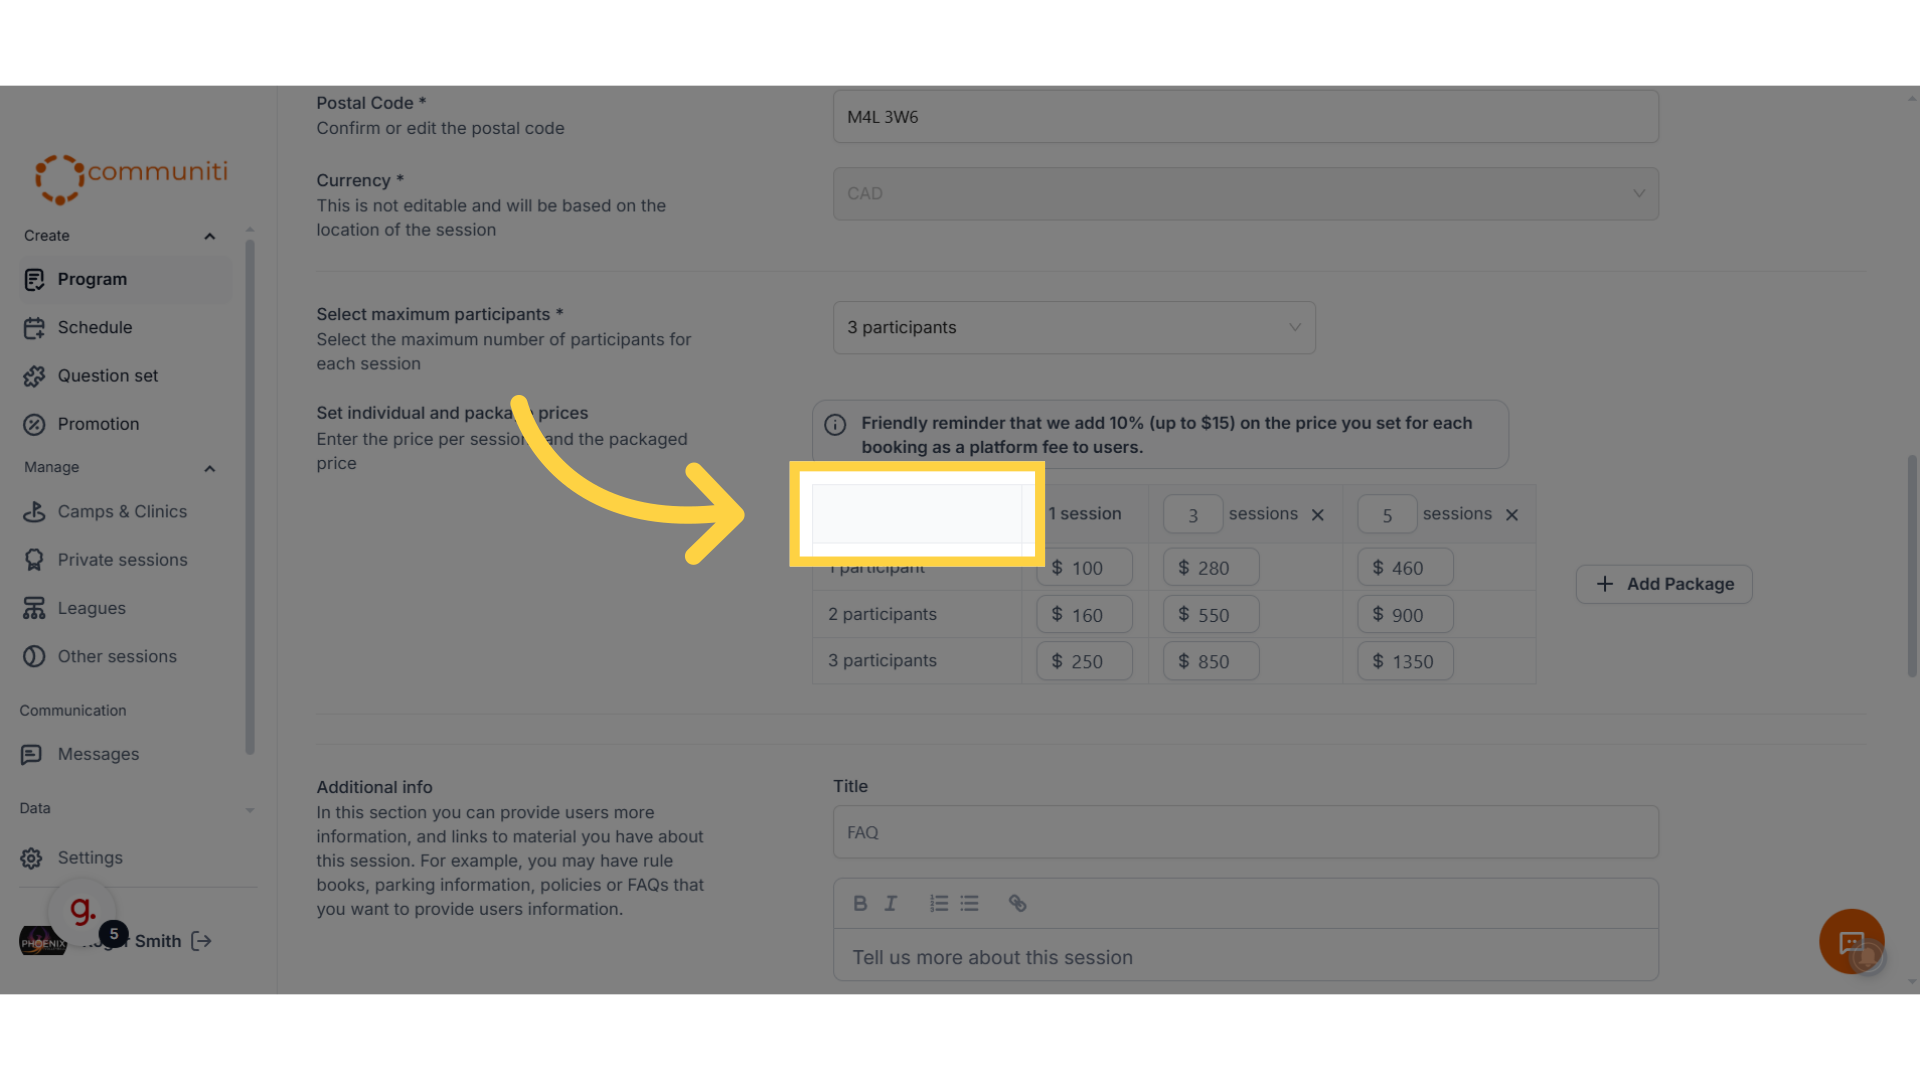
5. Select a package structure and define pricing
You can choose to have any number of packages. Example - 1, 3 and 5 lessons. Once you've decided on a package structure, set the pricing for each variation
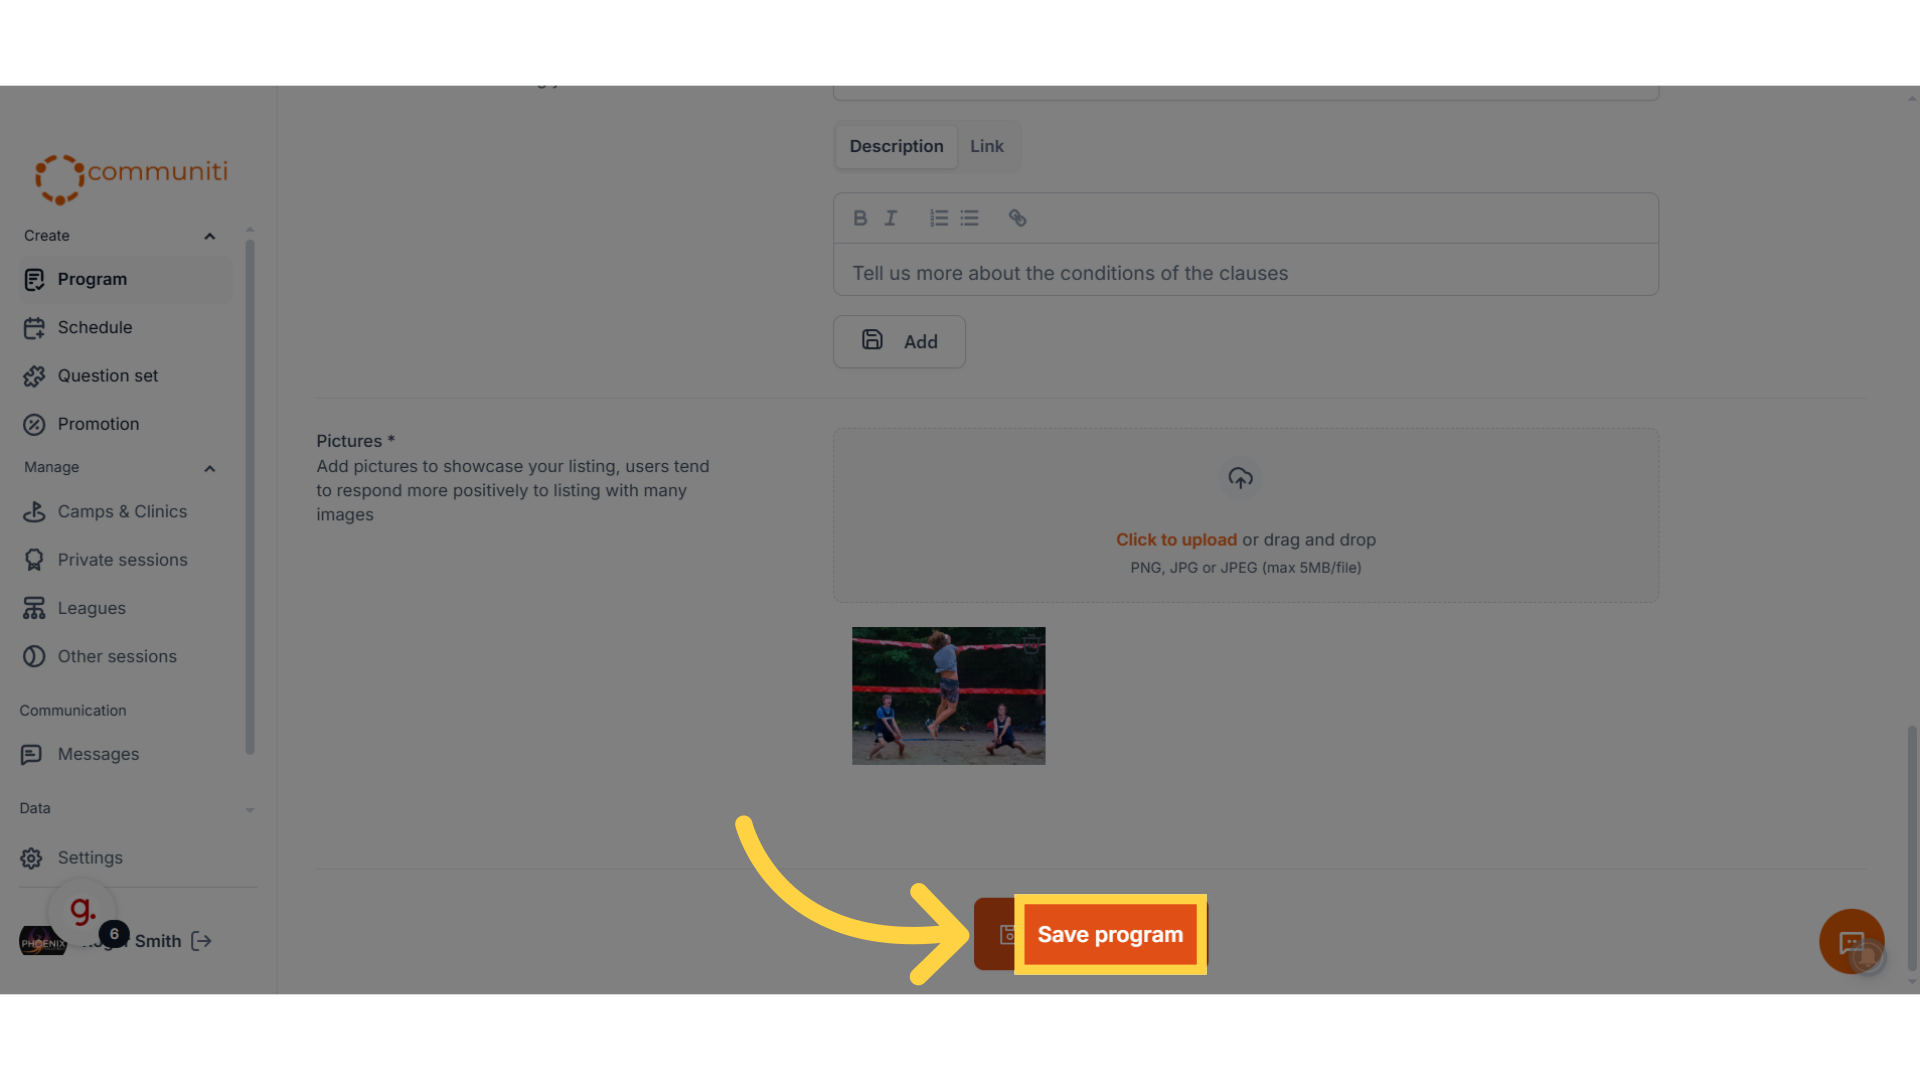
6. Click "Save program"
Integrate your calendar and set availability
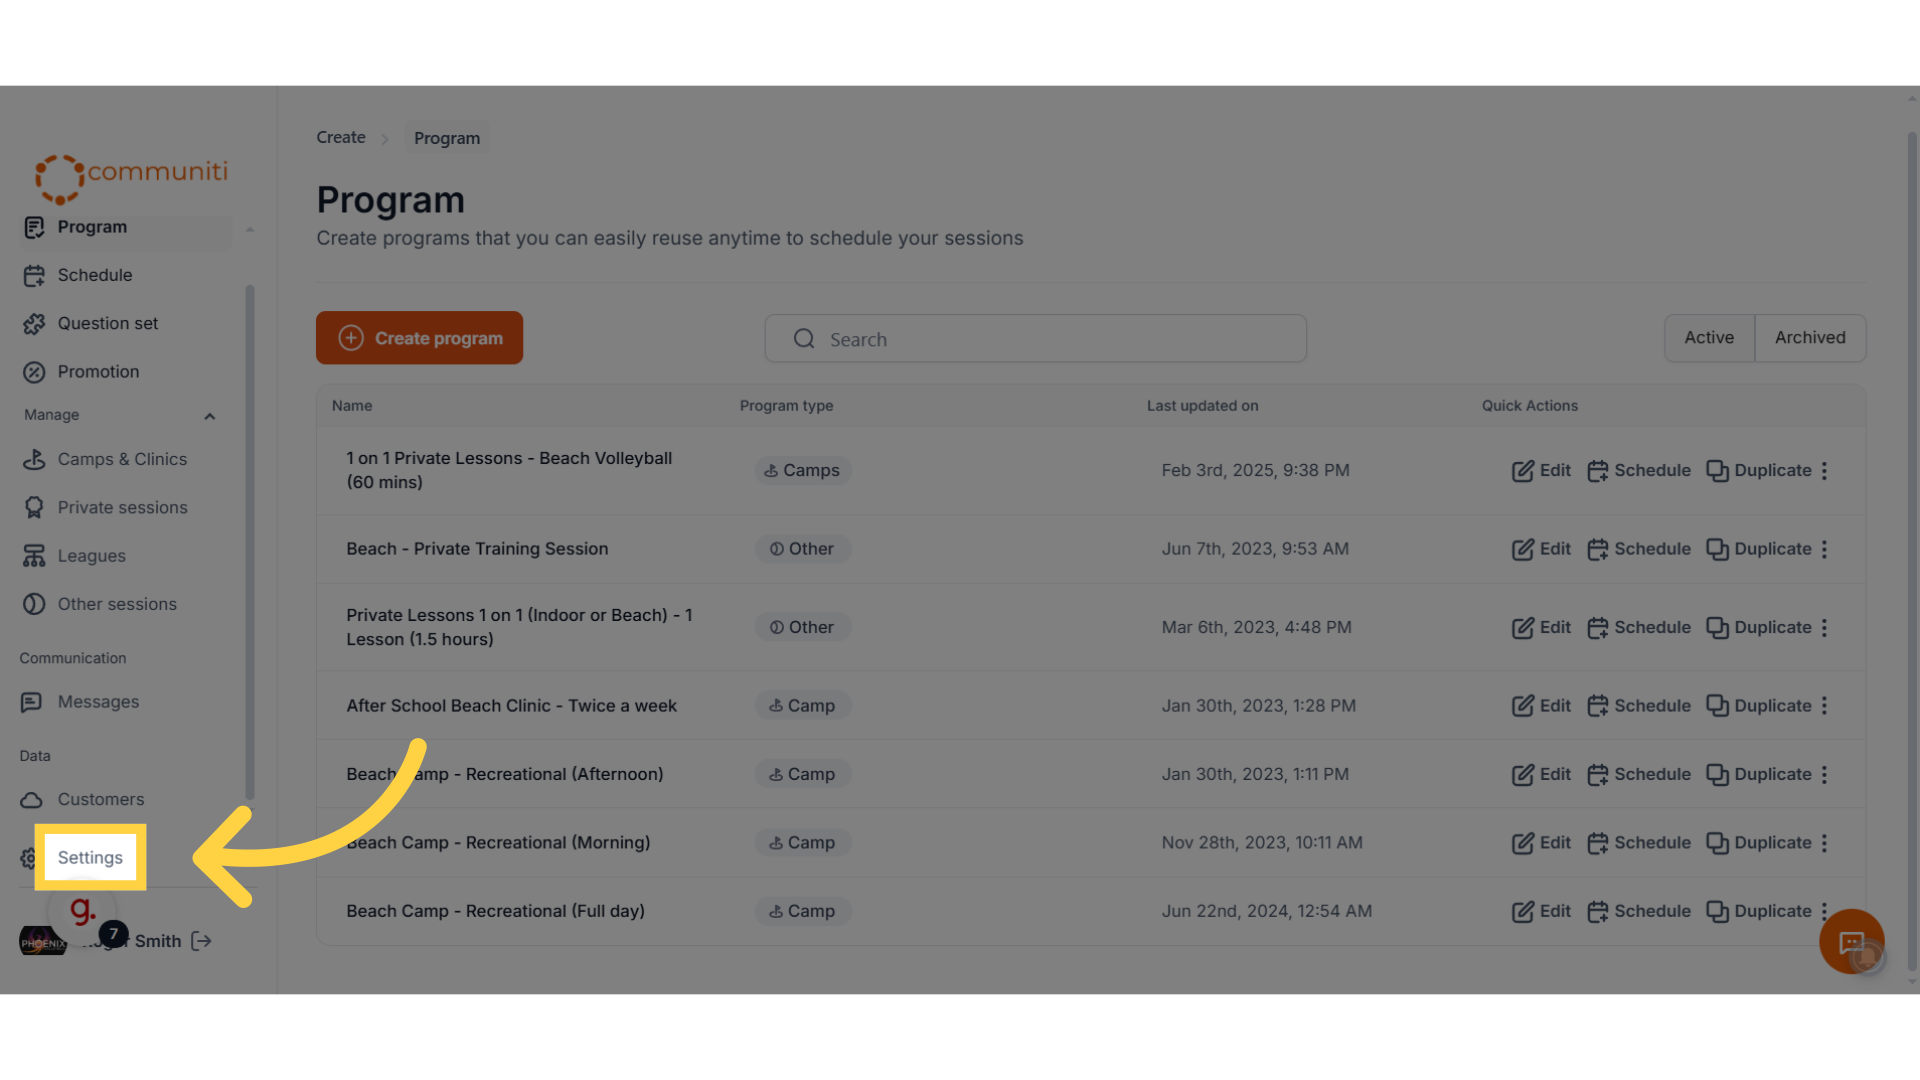
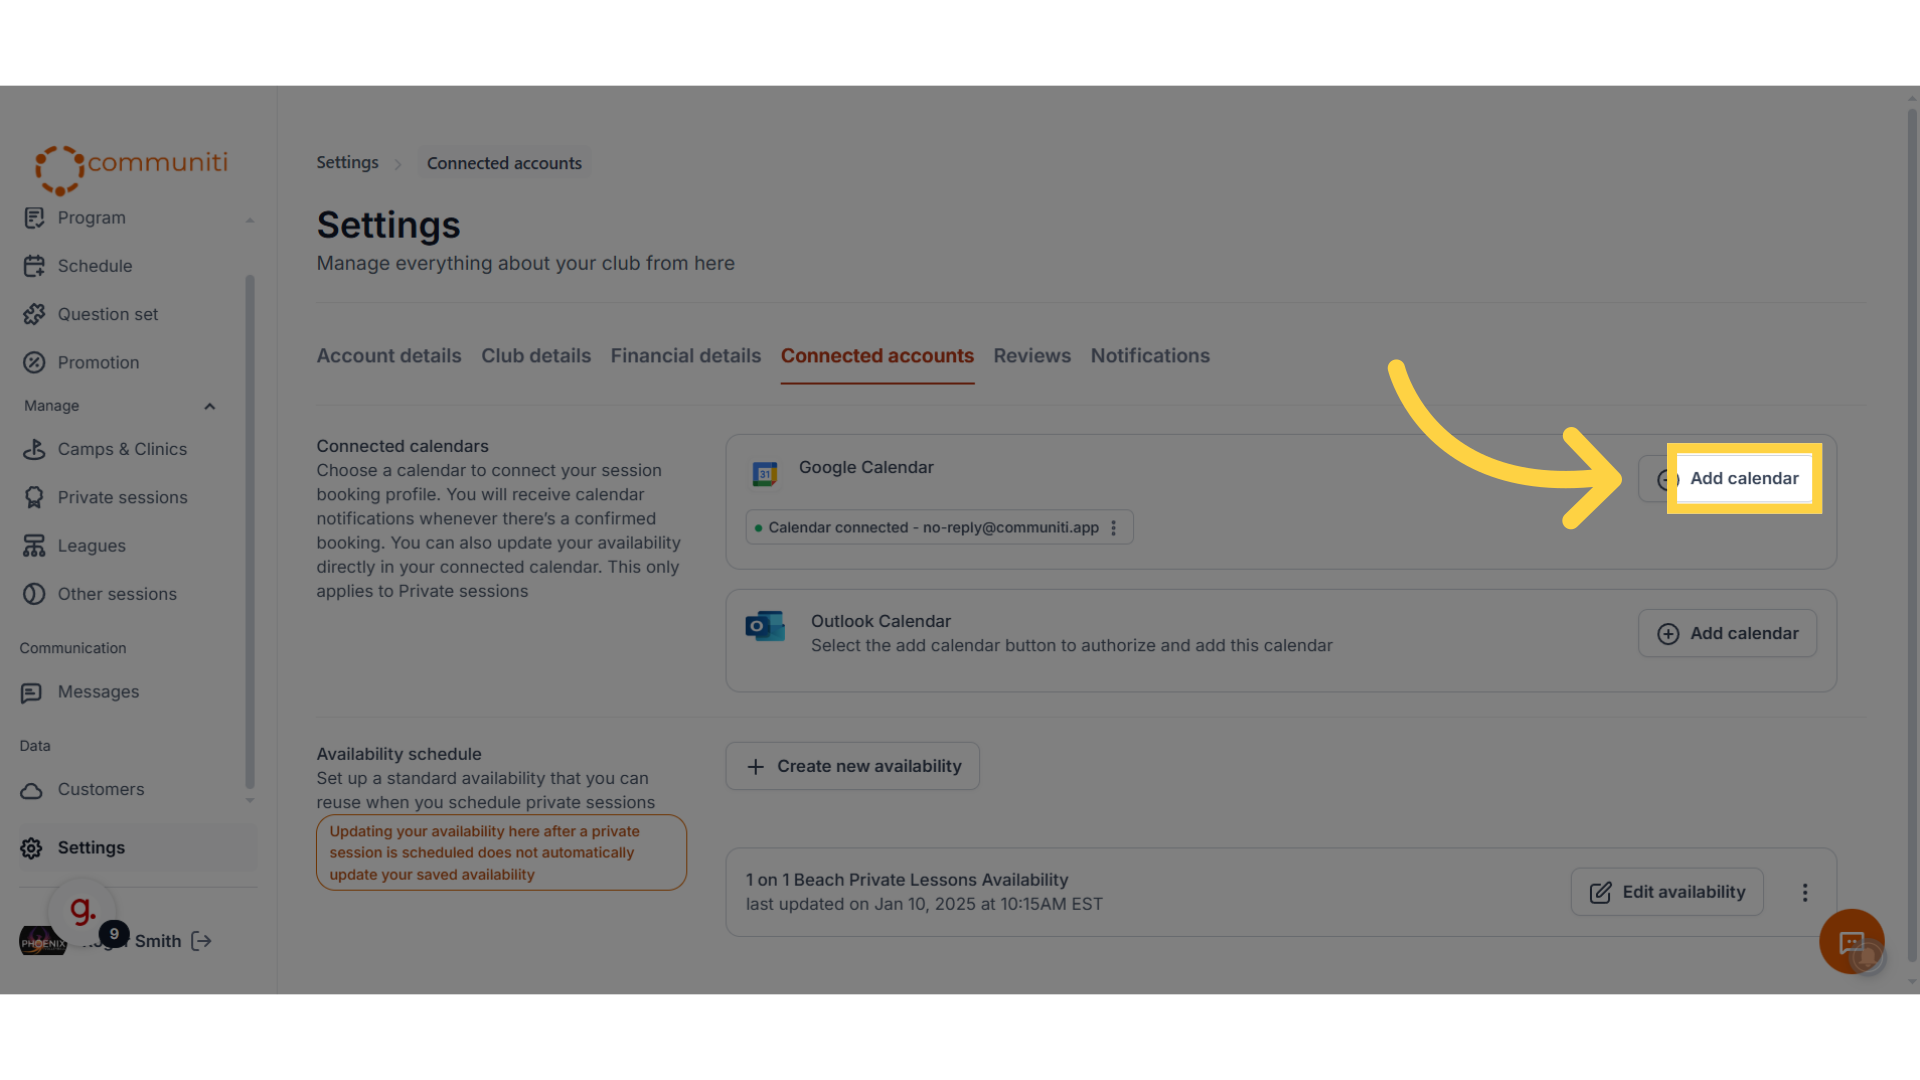
7. Click "Settings"
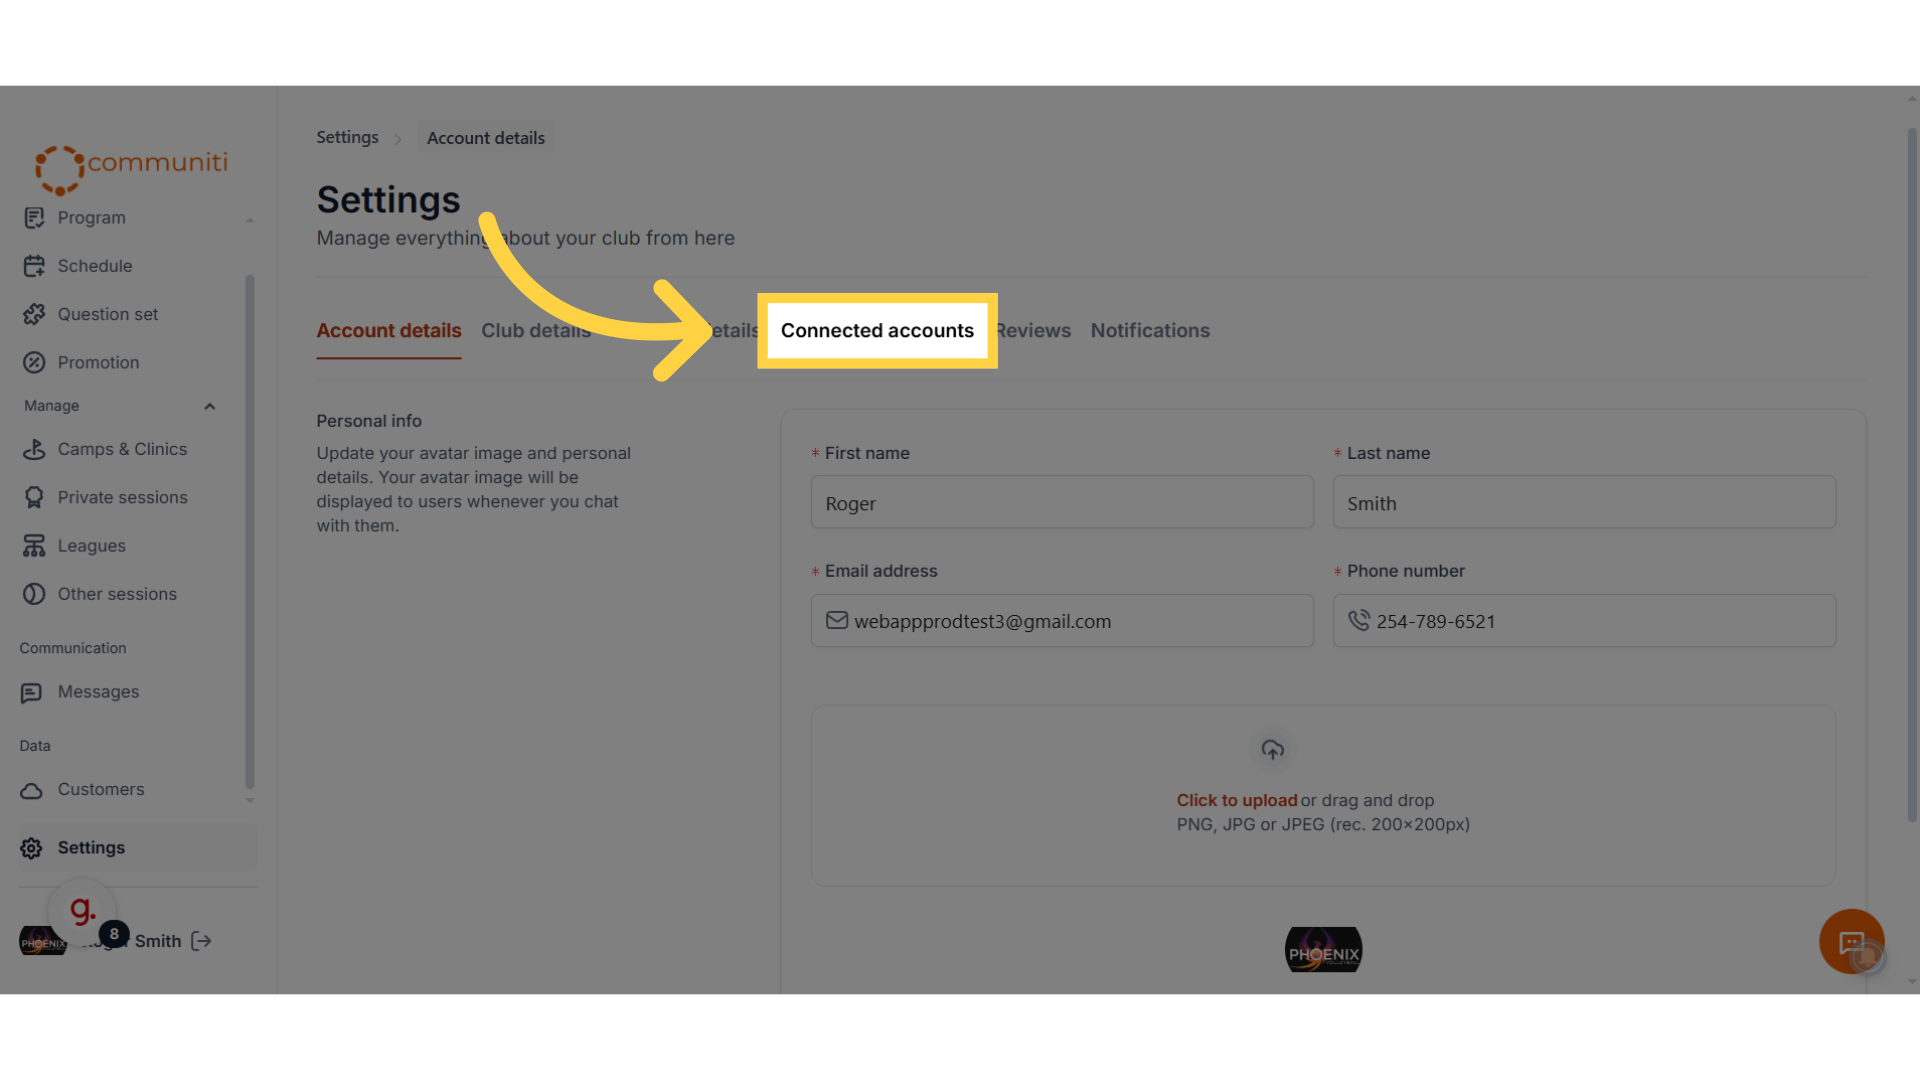
8. Click "Connected accounts"
Connect your calendar to integrate scheduling seamlessly.
9. Click "Add calendar"
Add your google or outlook calendar
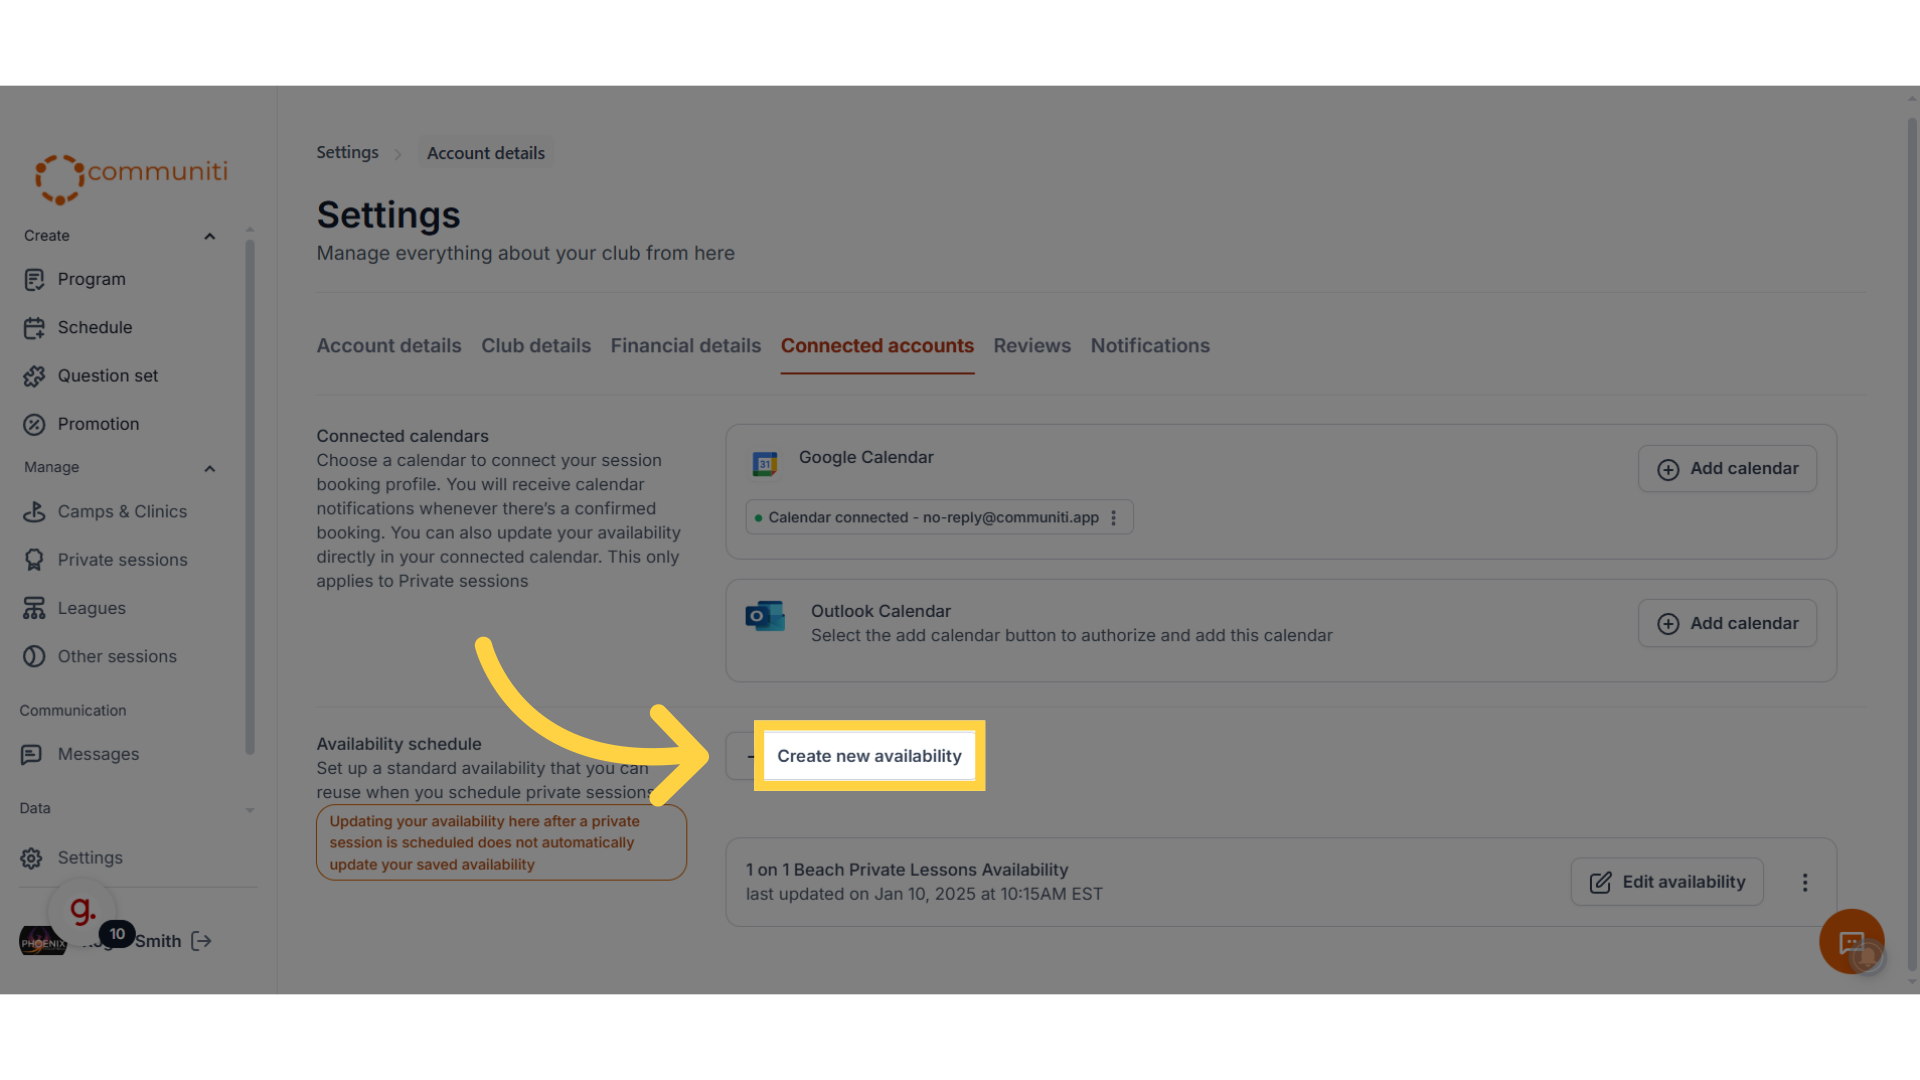
10. Click "Create new availability"
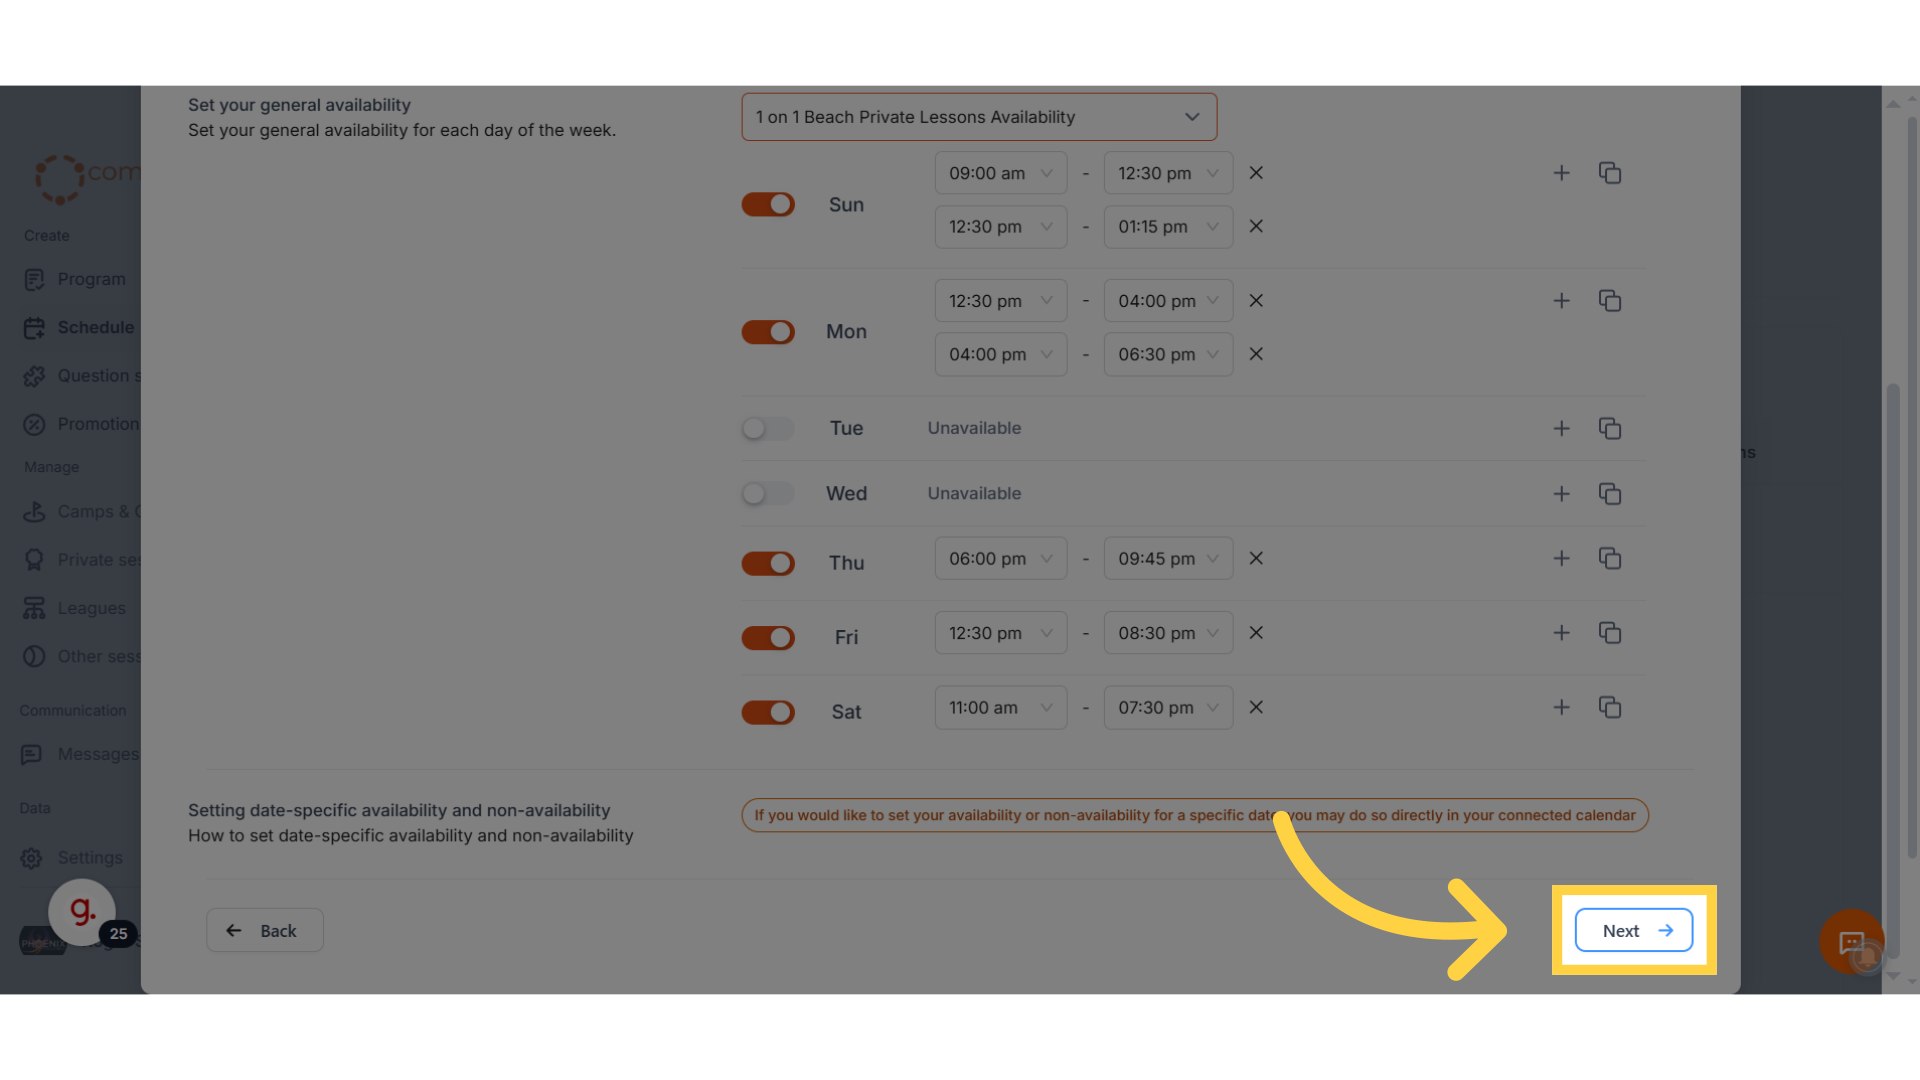
Define your availability to allow users to book their preferred session times.
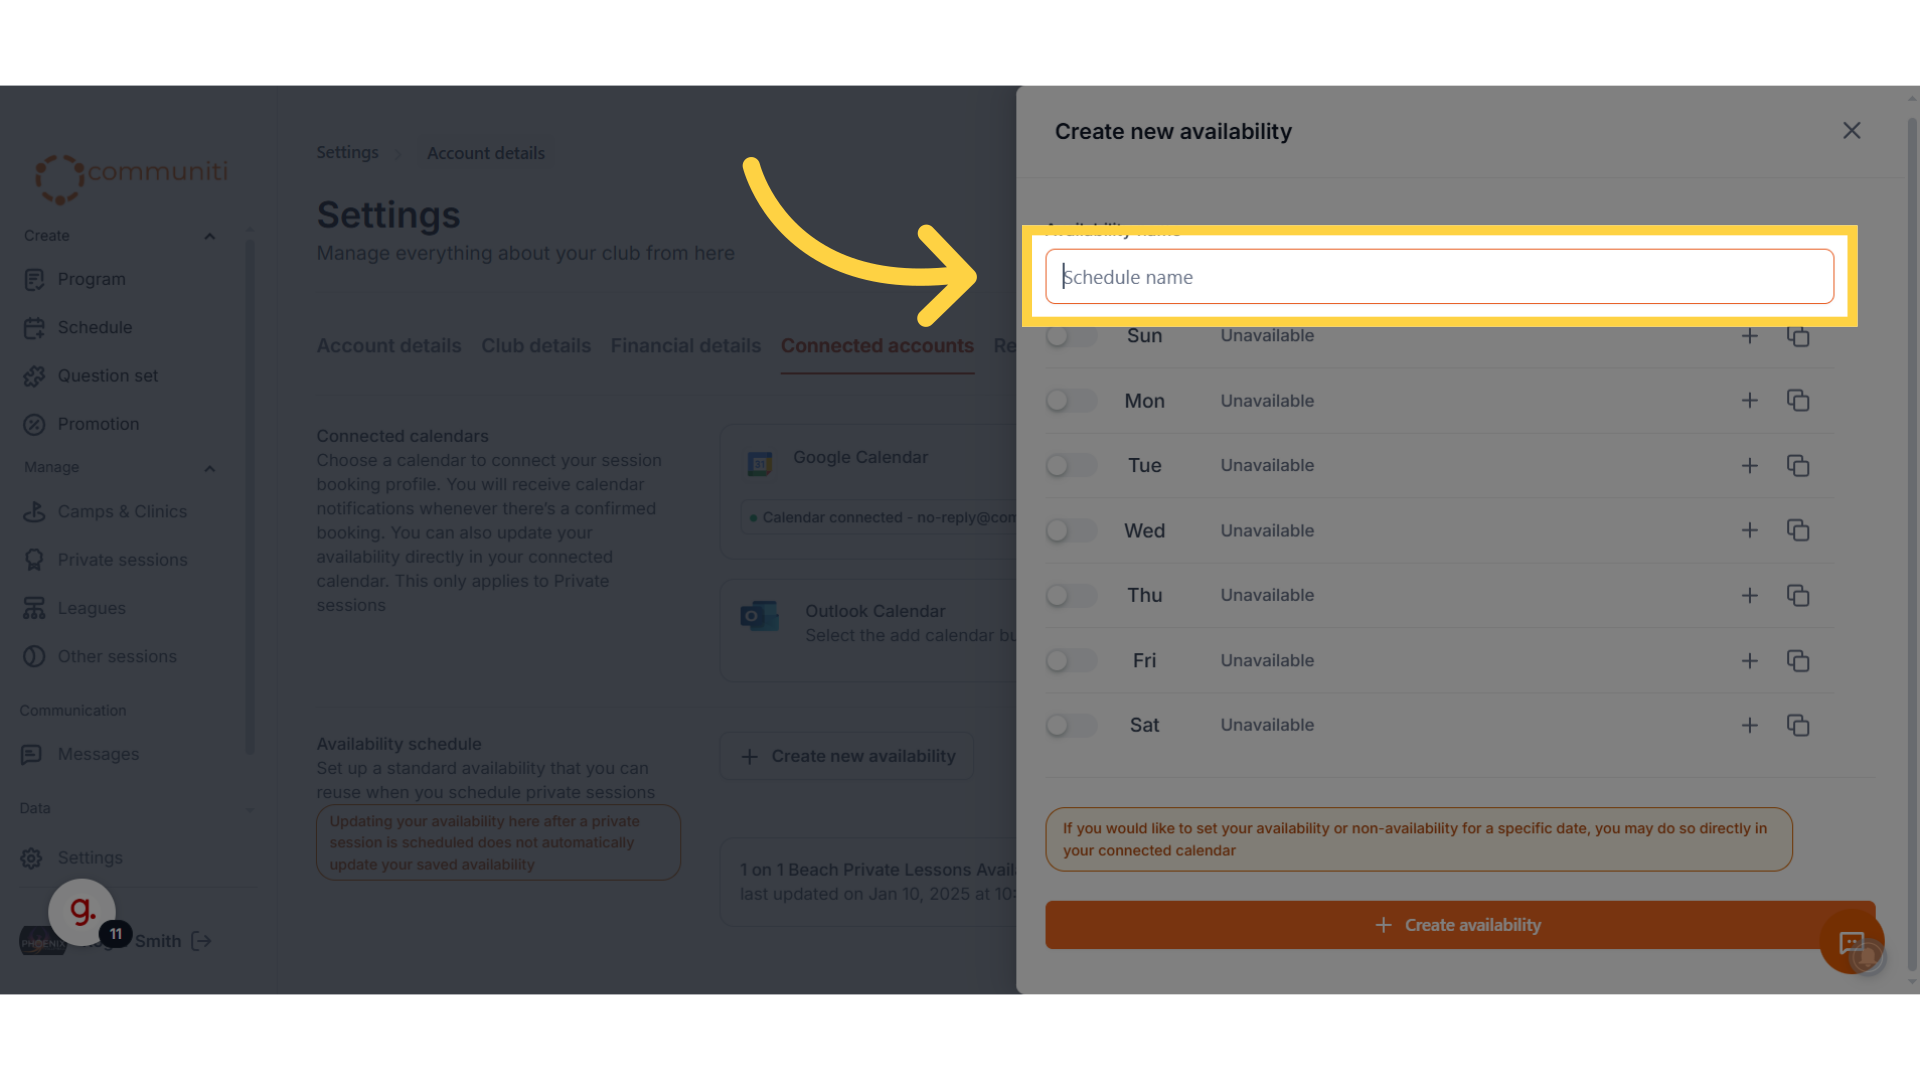
11. Enter a schedule name and set your availability
Ex. Availability for 1 on 1 Beach Volleyball Lessons
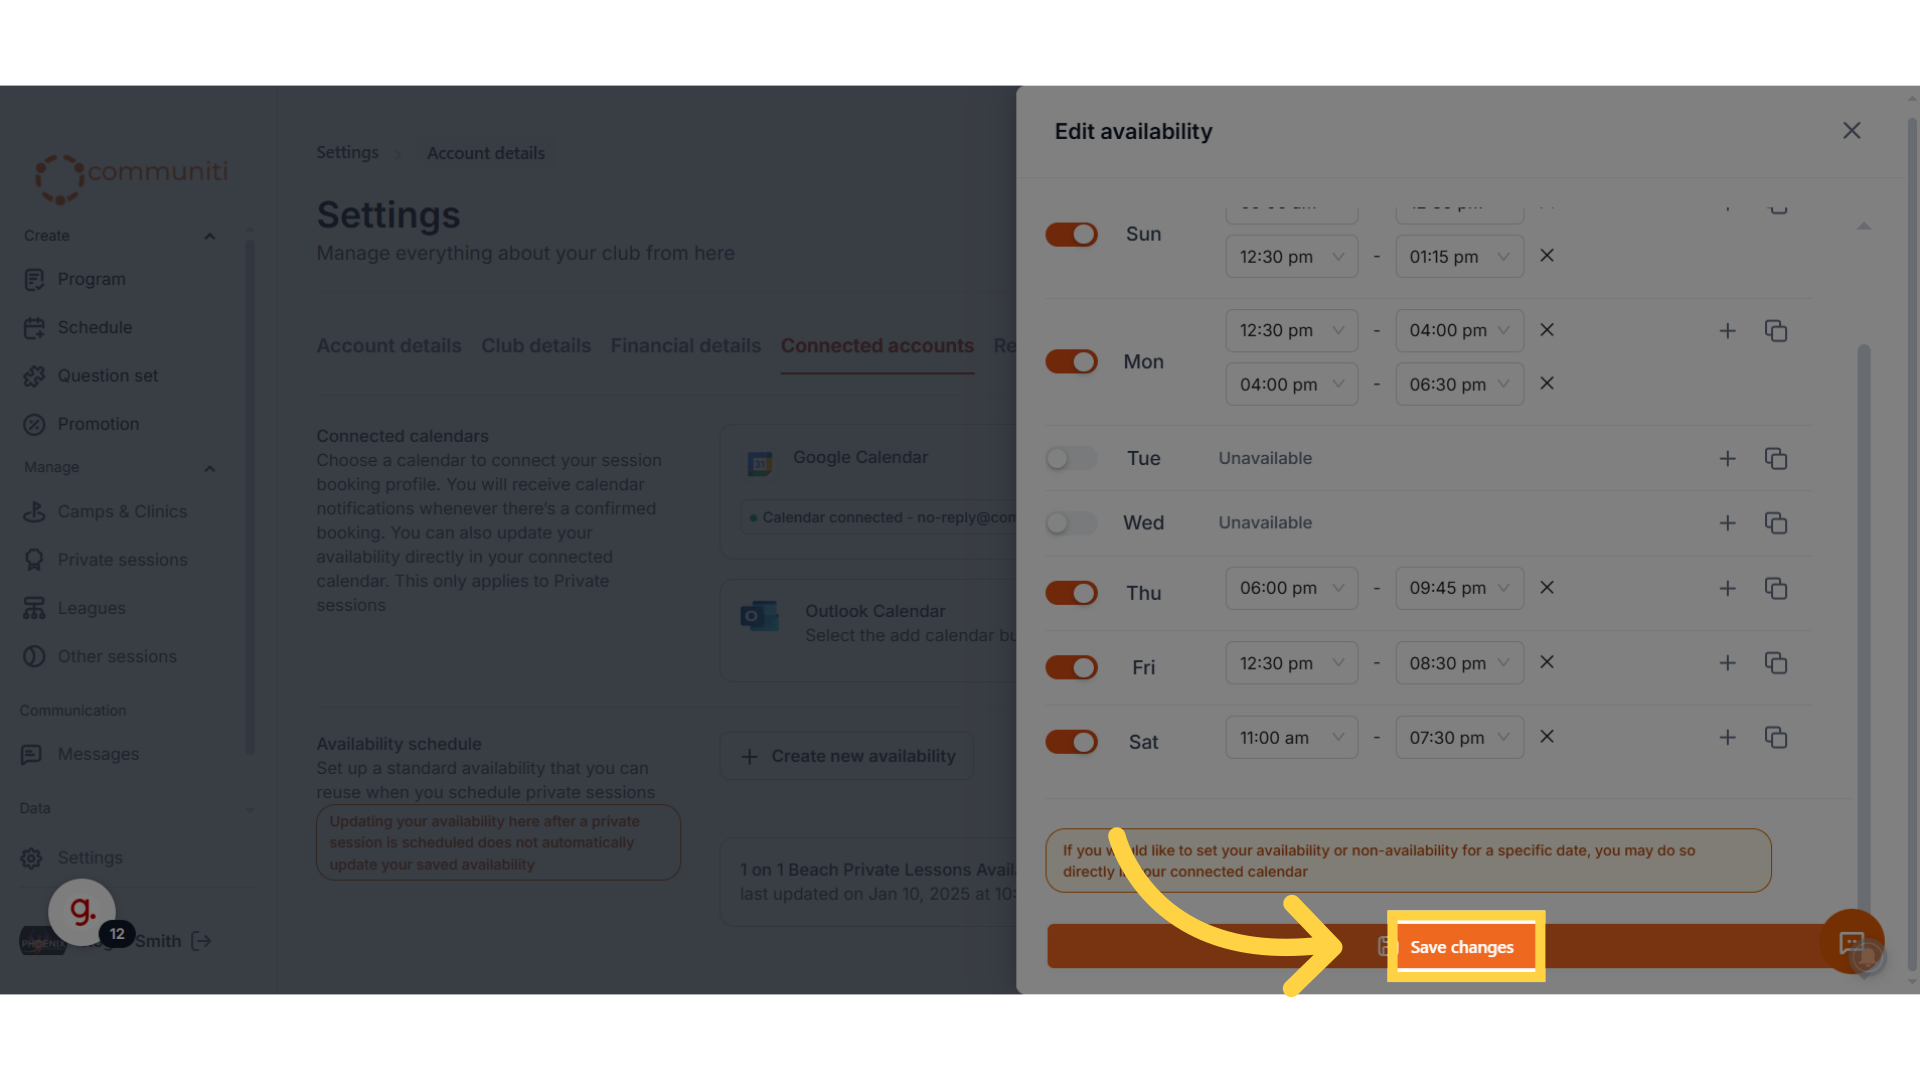
12. Click "Save changes"
Once you've entered your availability click Save.
Make your private session live for people to book
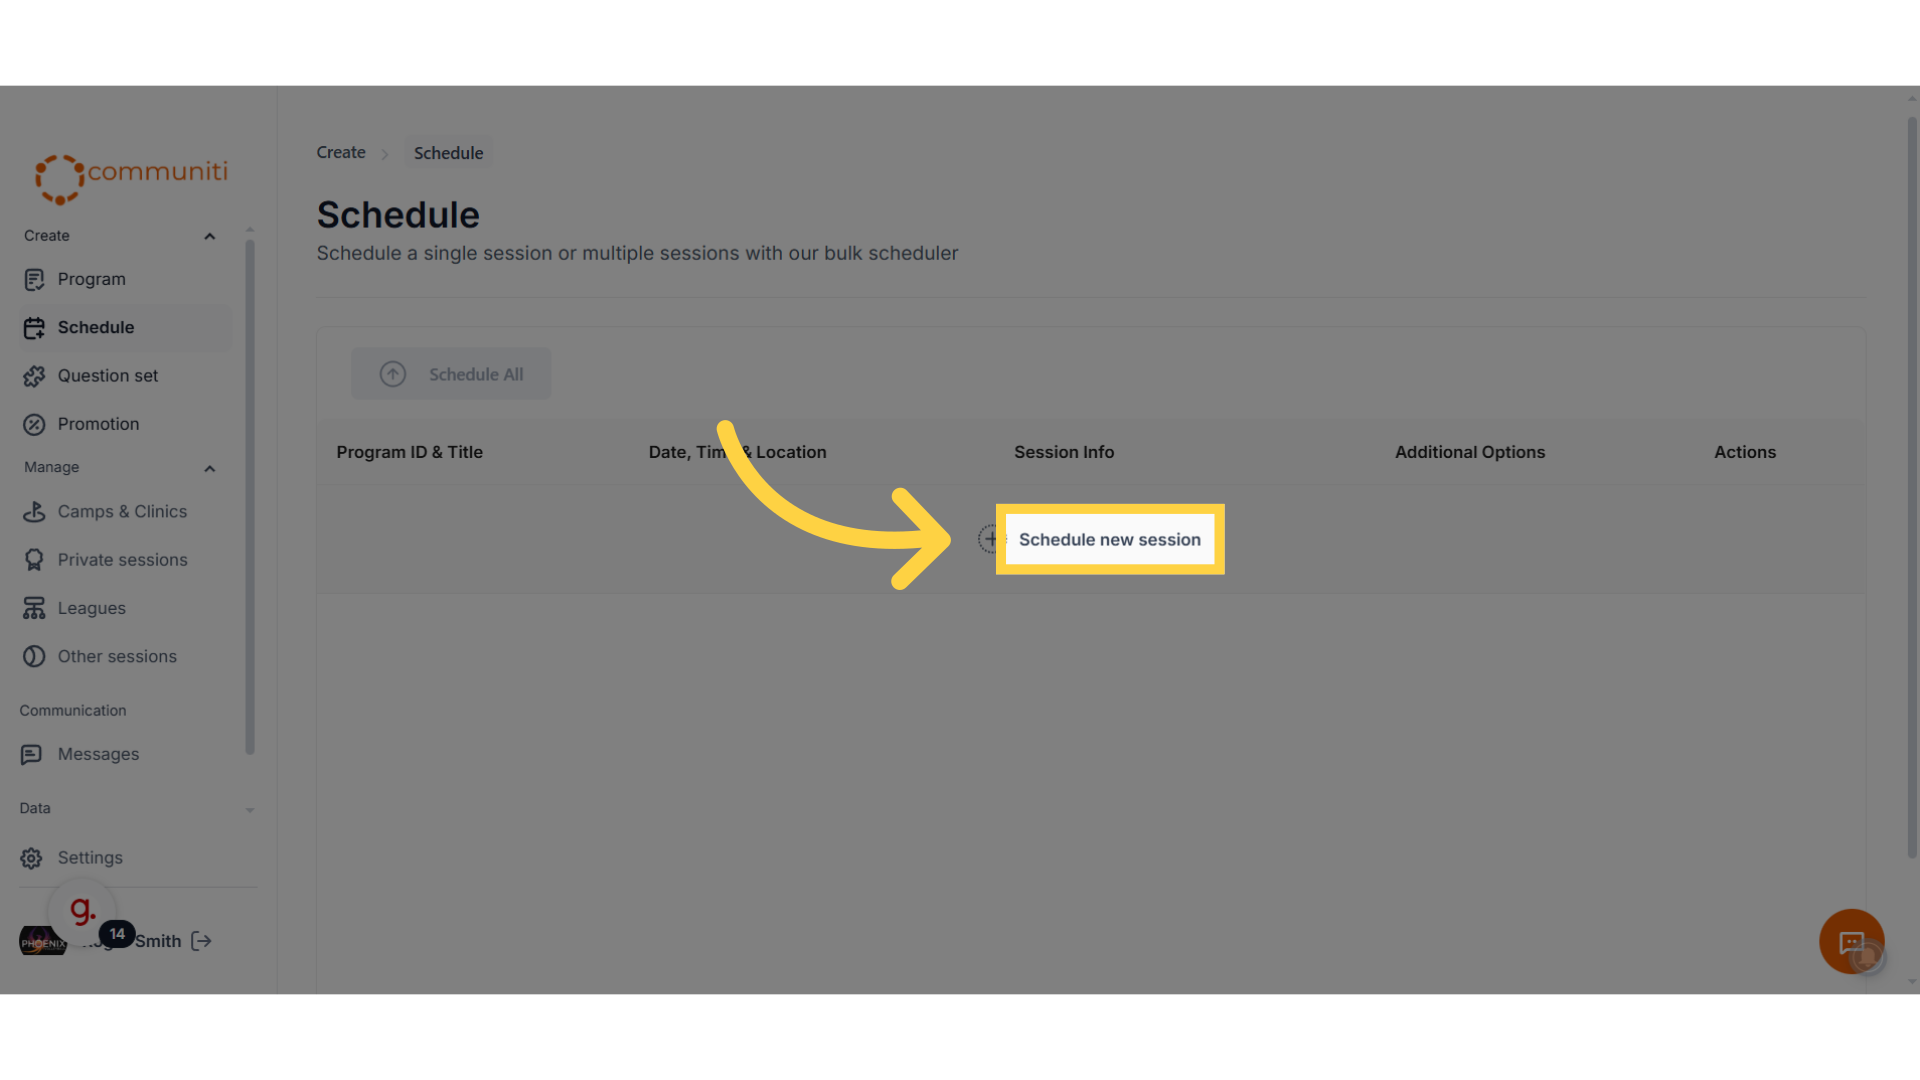
13. Under the Create Menu, click "Schedule"
Navigate to the scheduling section to make your private sessions live

14. Click "Schedule new session"
15. Select your private lesson program
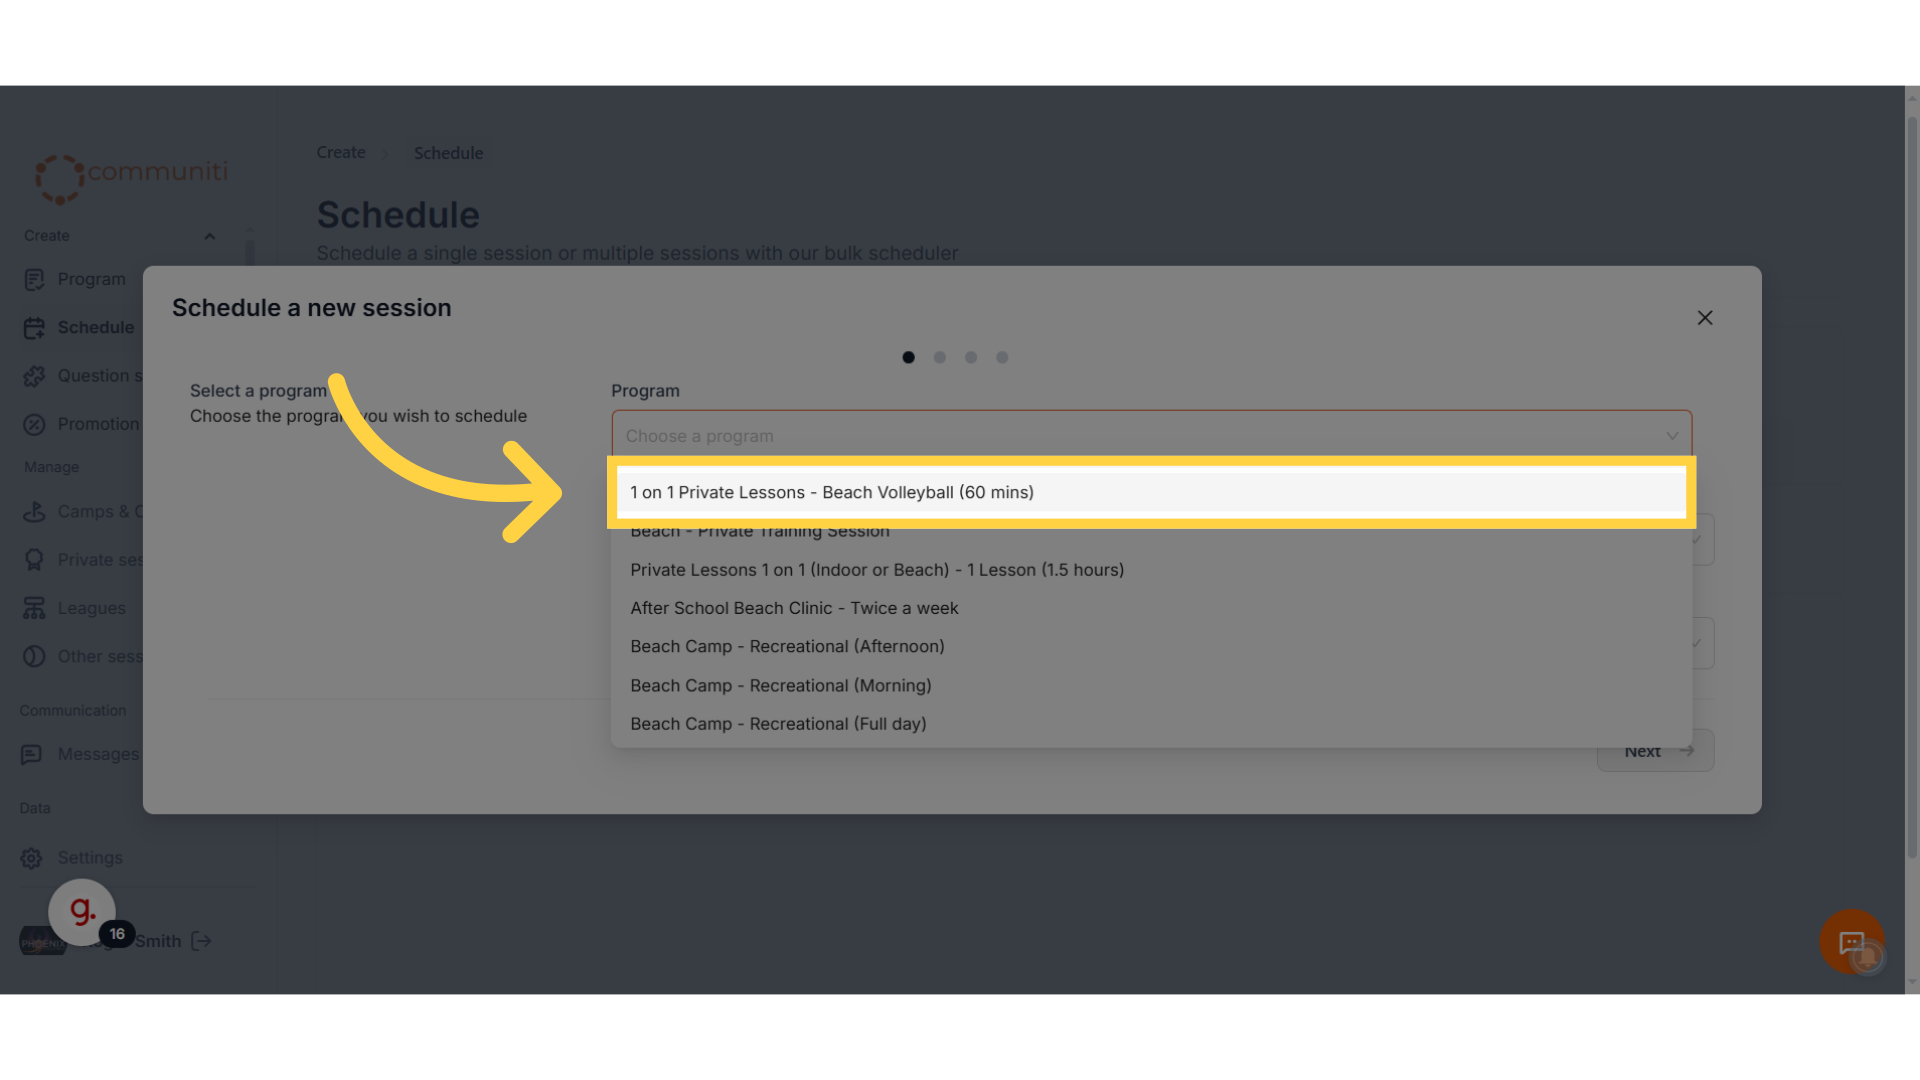
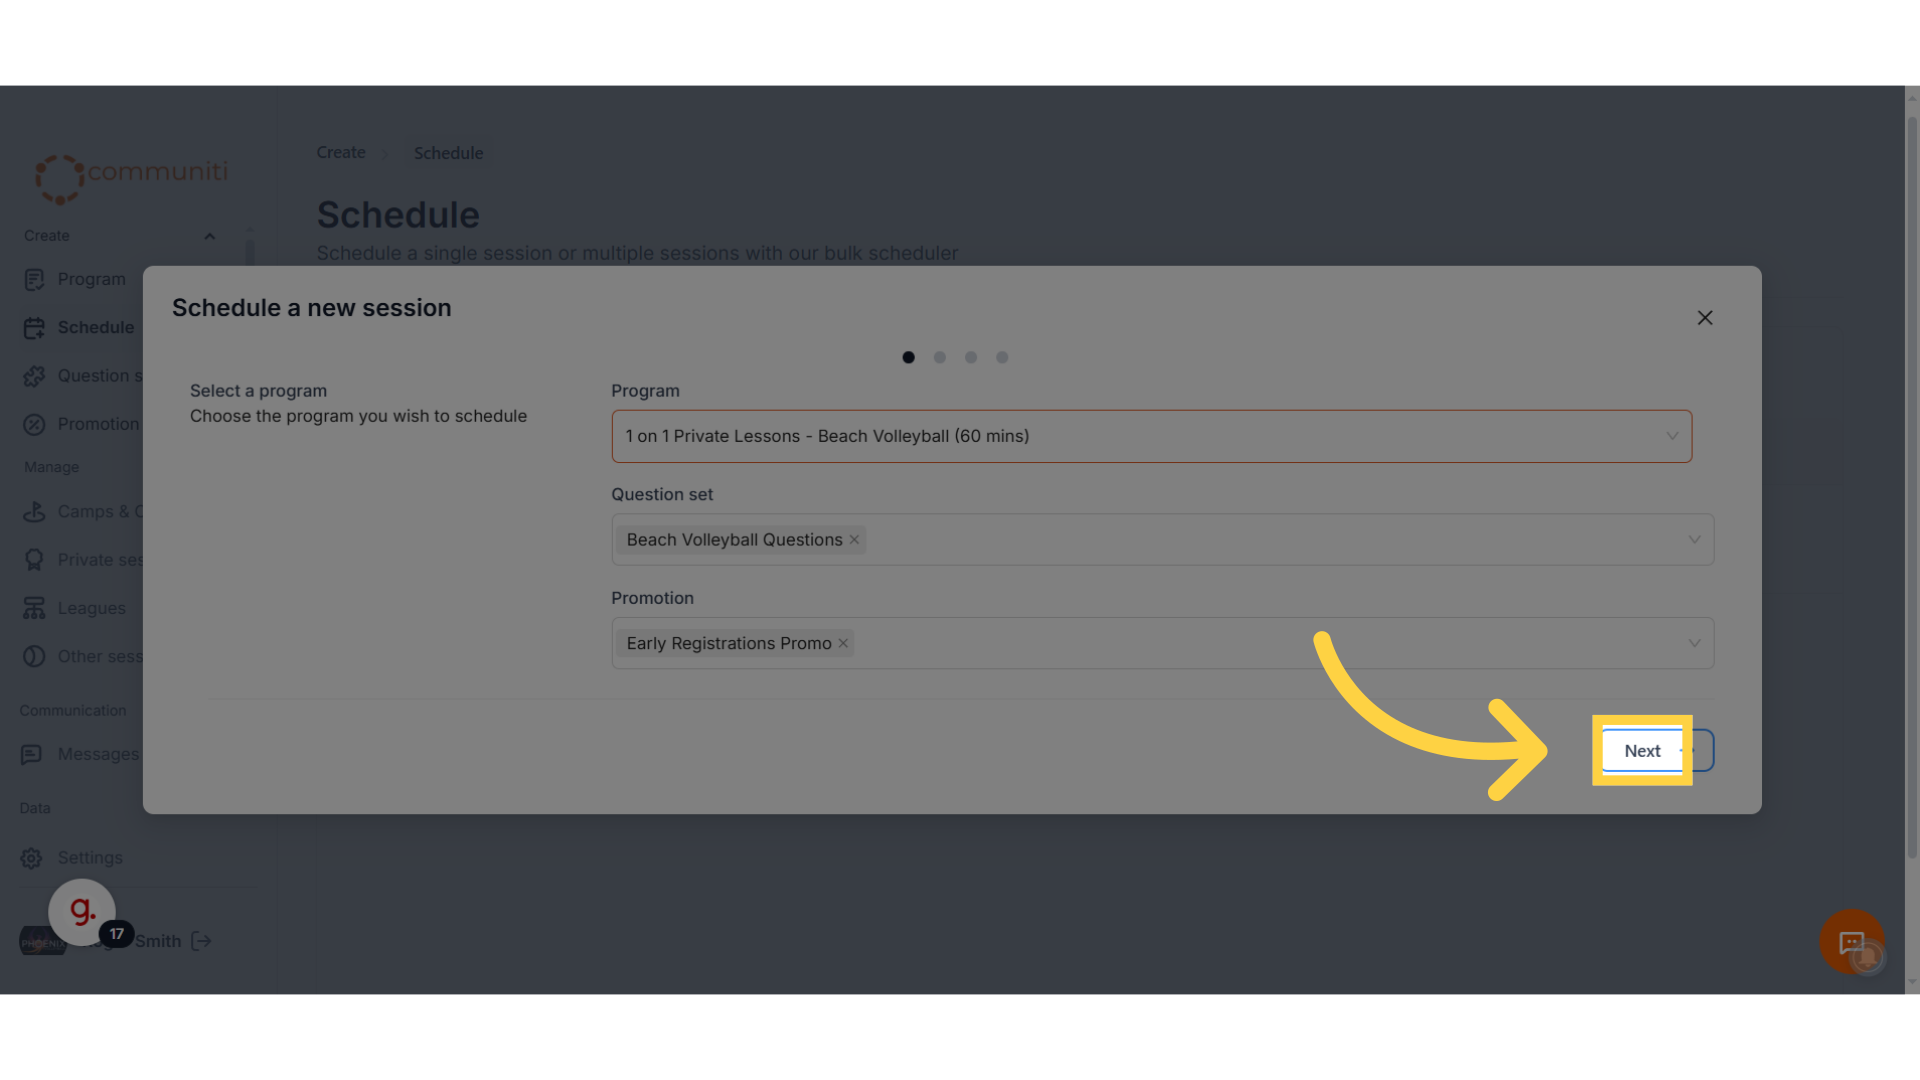
16. Click "Next"
If there are any questions or promotions add them and move on to the next step
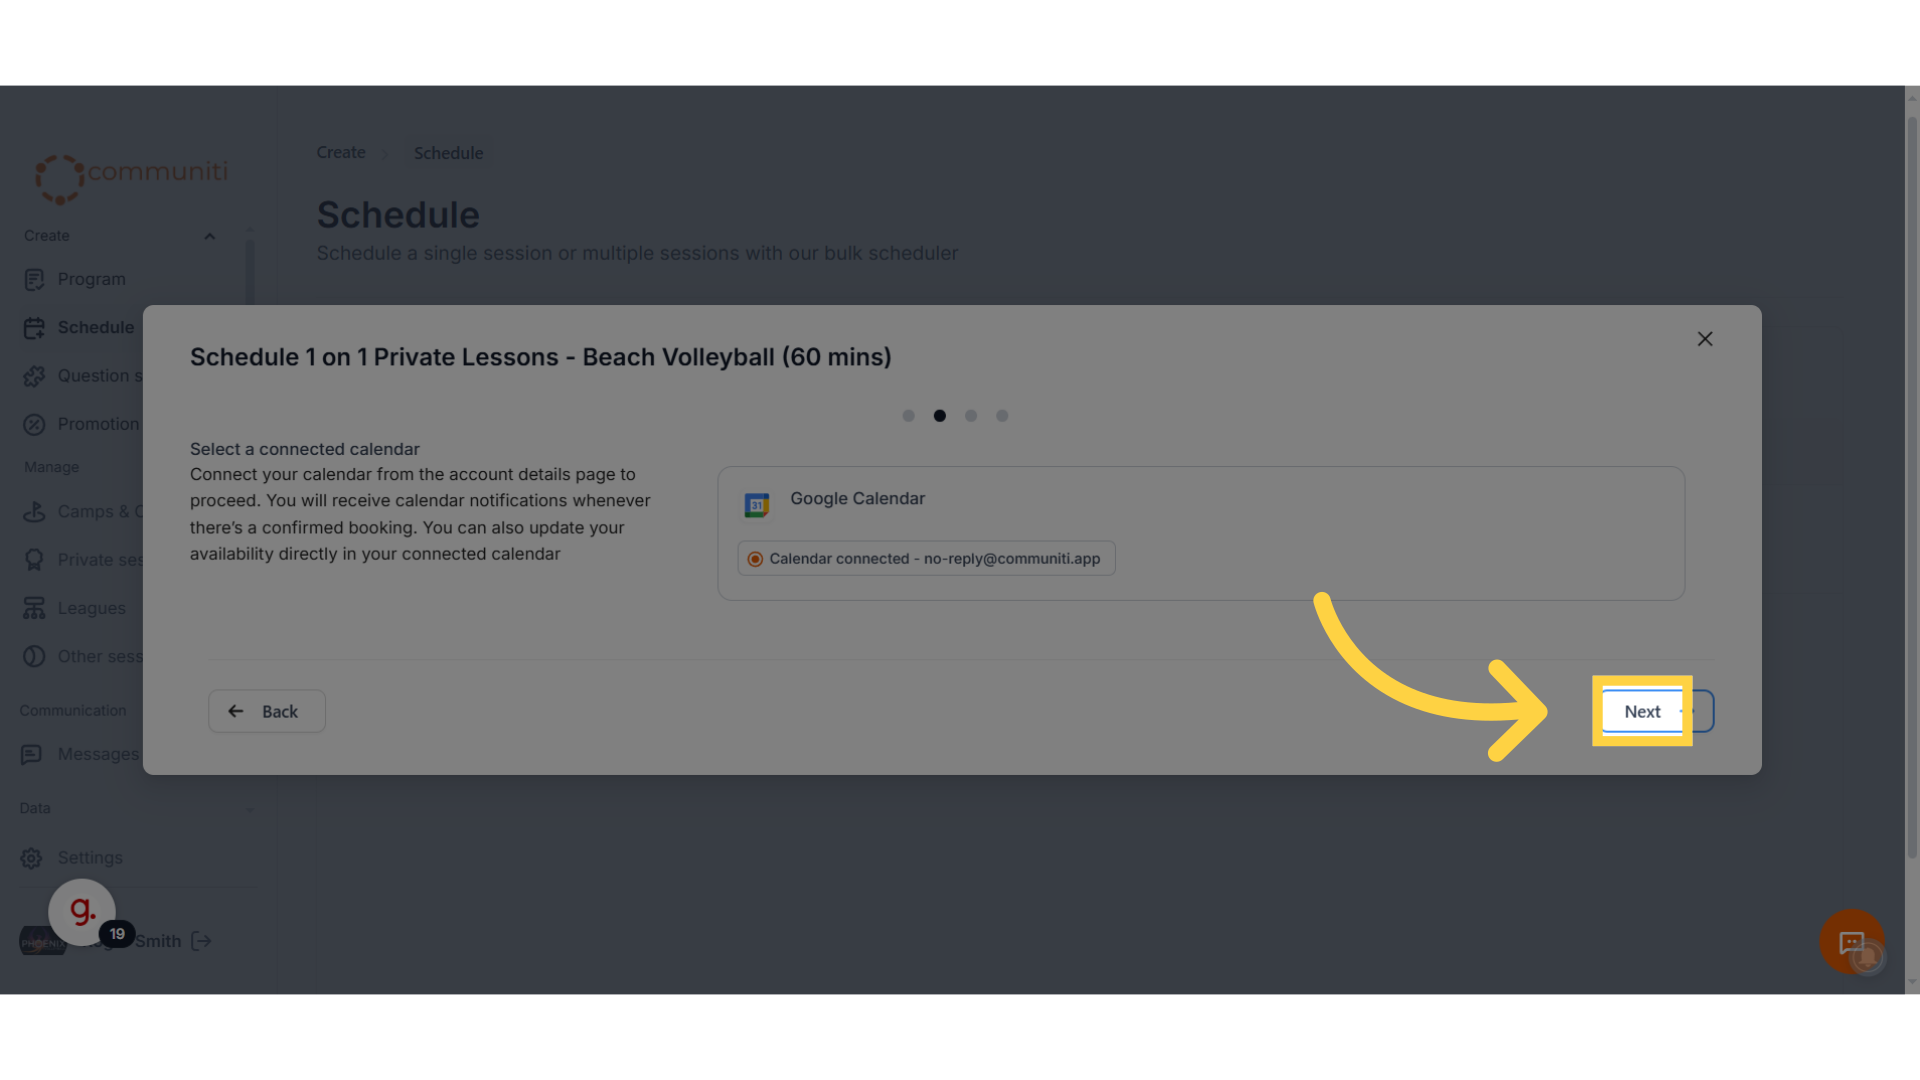
17. Select the calendar you added in the previous step
if you have multiple calendars, select the one that you want to use for this sessions.
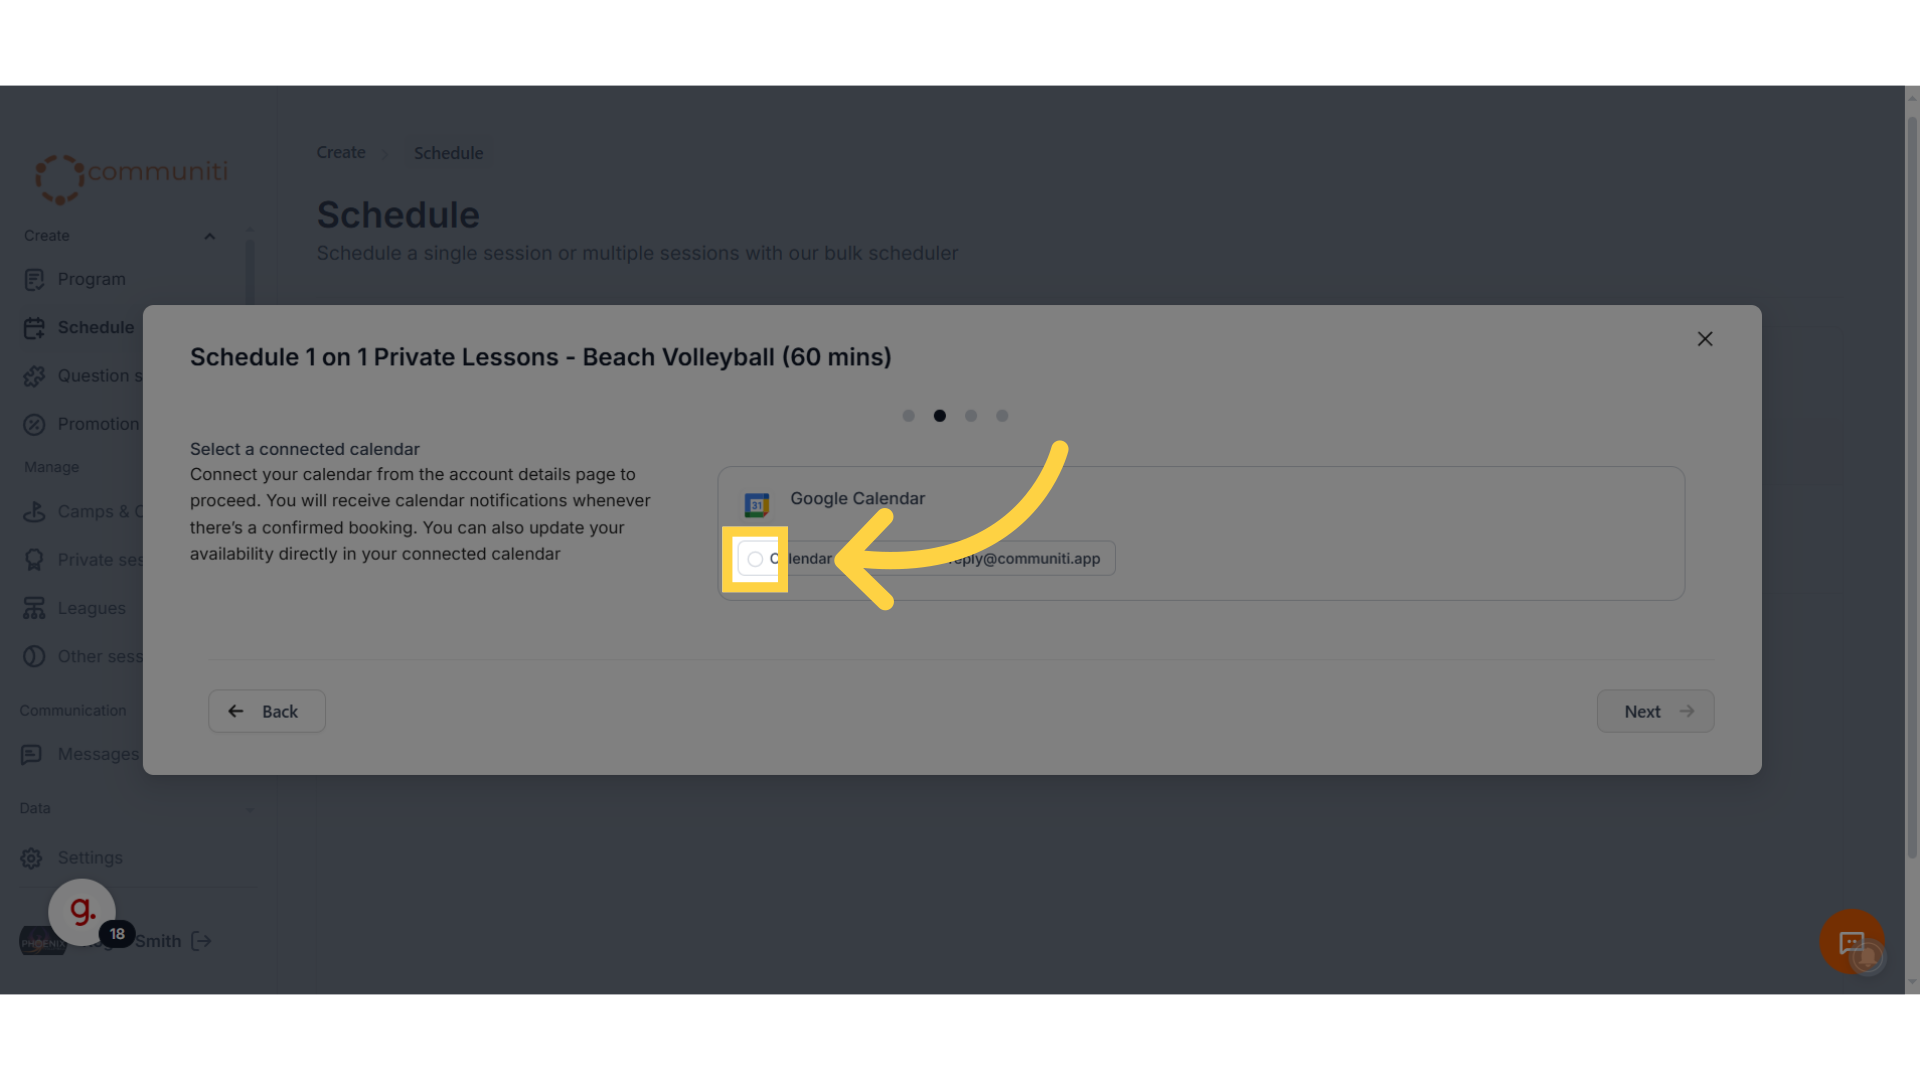
18. Click "Next"
Move forward to finalize your session configurations.
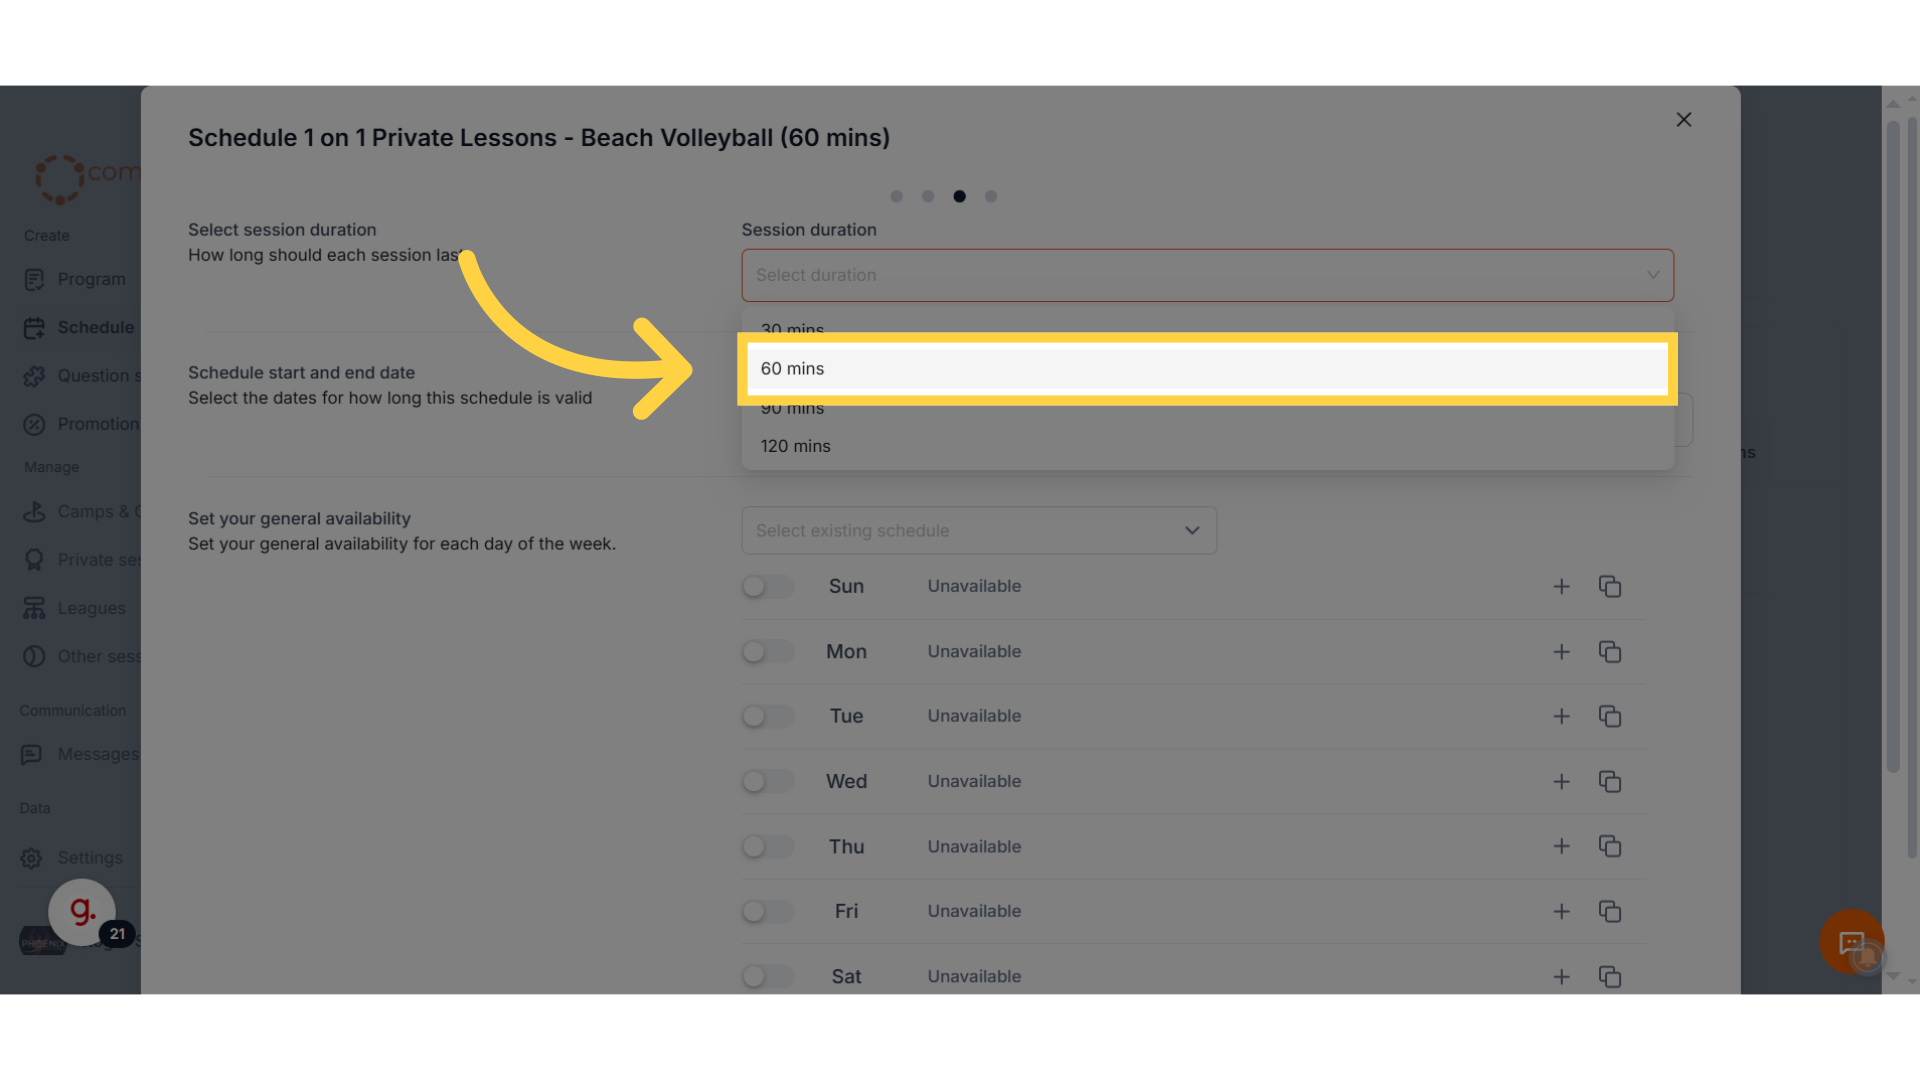
19. Select the duration of your private session
This information is needed so that we can optimize your calendar bookings.
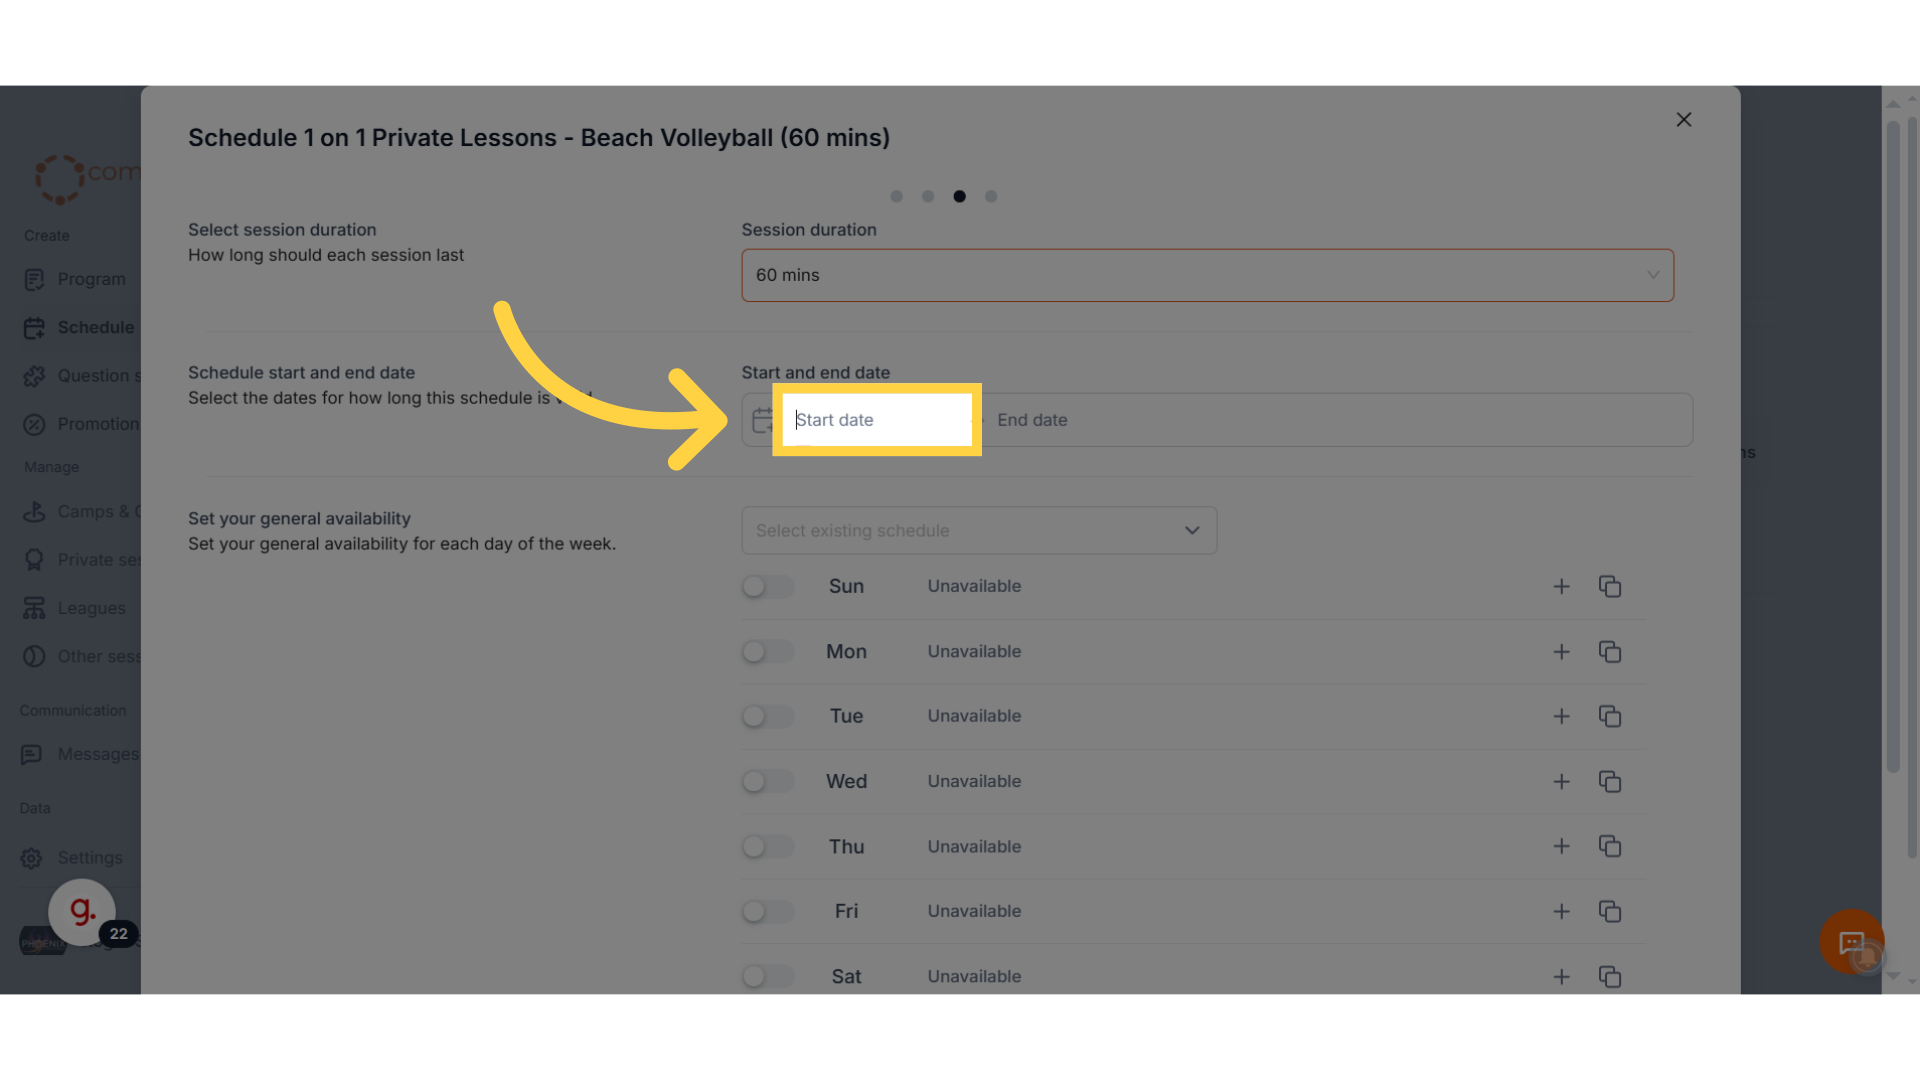
20. Set Start and End Dates for your Private Session
The program will be open to book in this window.
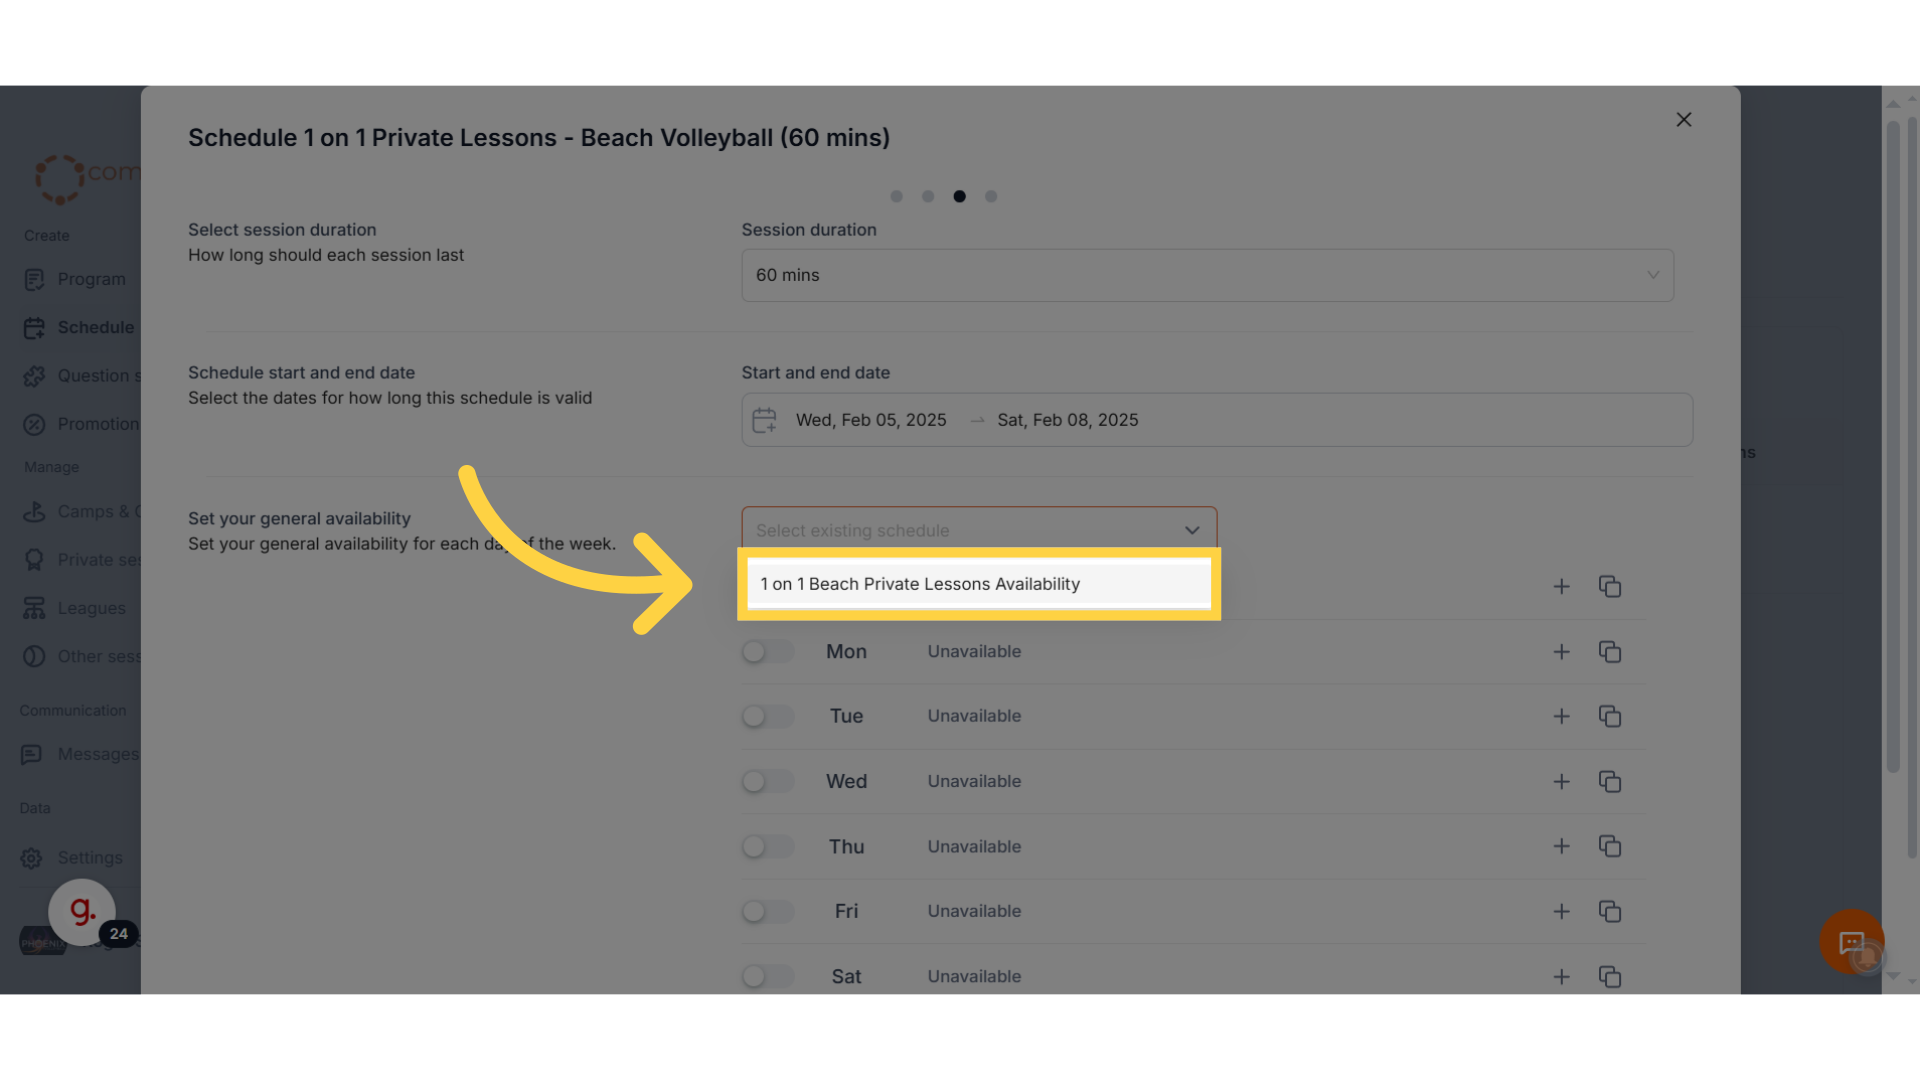
21. Select the availability schedule you defined previously.
If you wish to make any changes to the availability, you can make them in this step
22. Click "Next"
Proceed to finalize your scheduling choices.
23. Review the information and make any changes to the pricing, packages, location etc.
Review your selections to ensure accuracy before confirming.
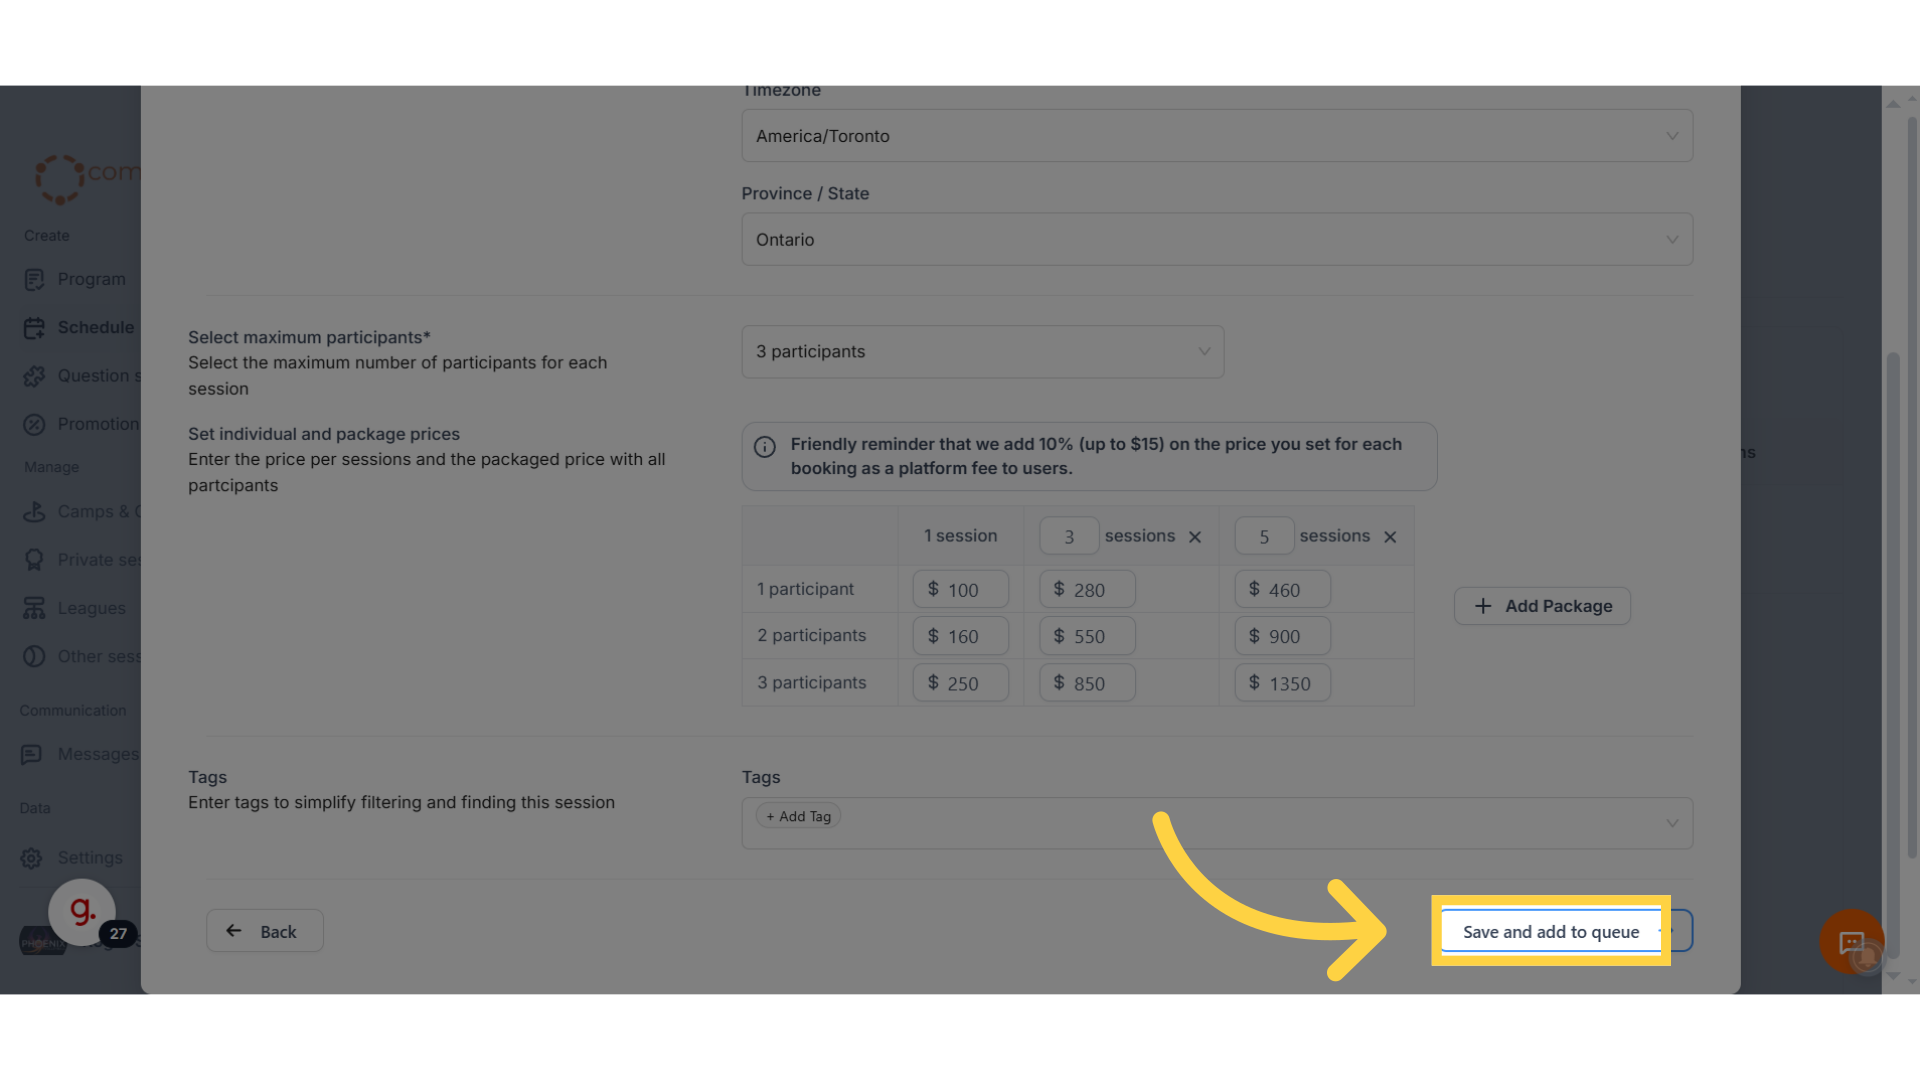
24. Click "Save and add to queue"
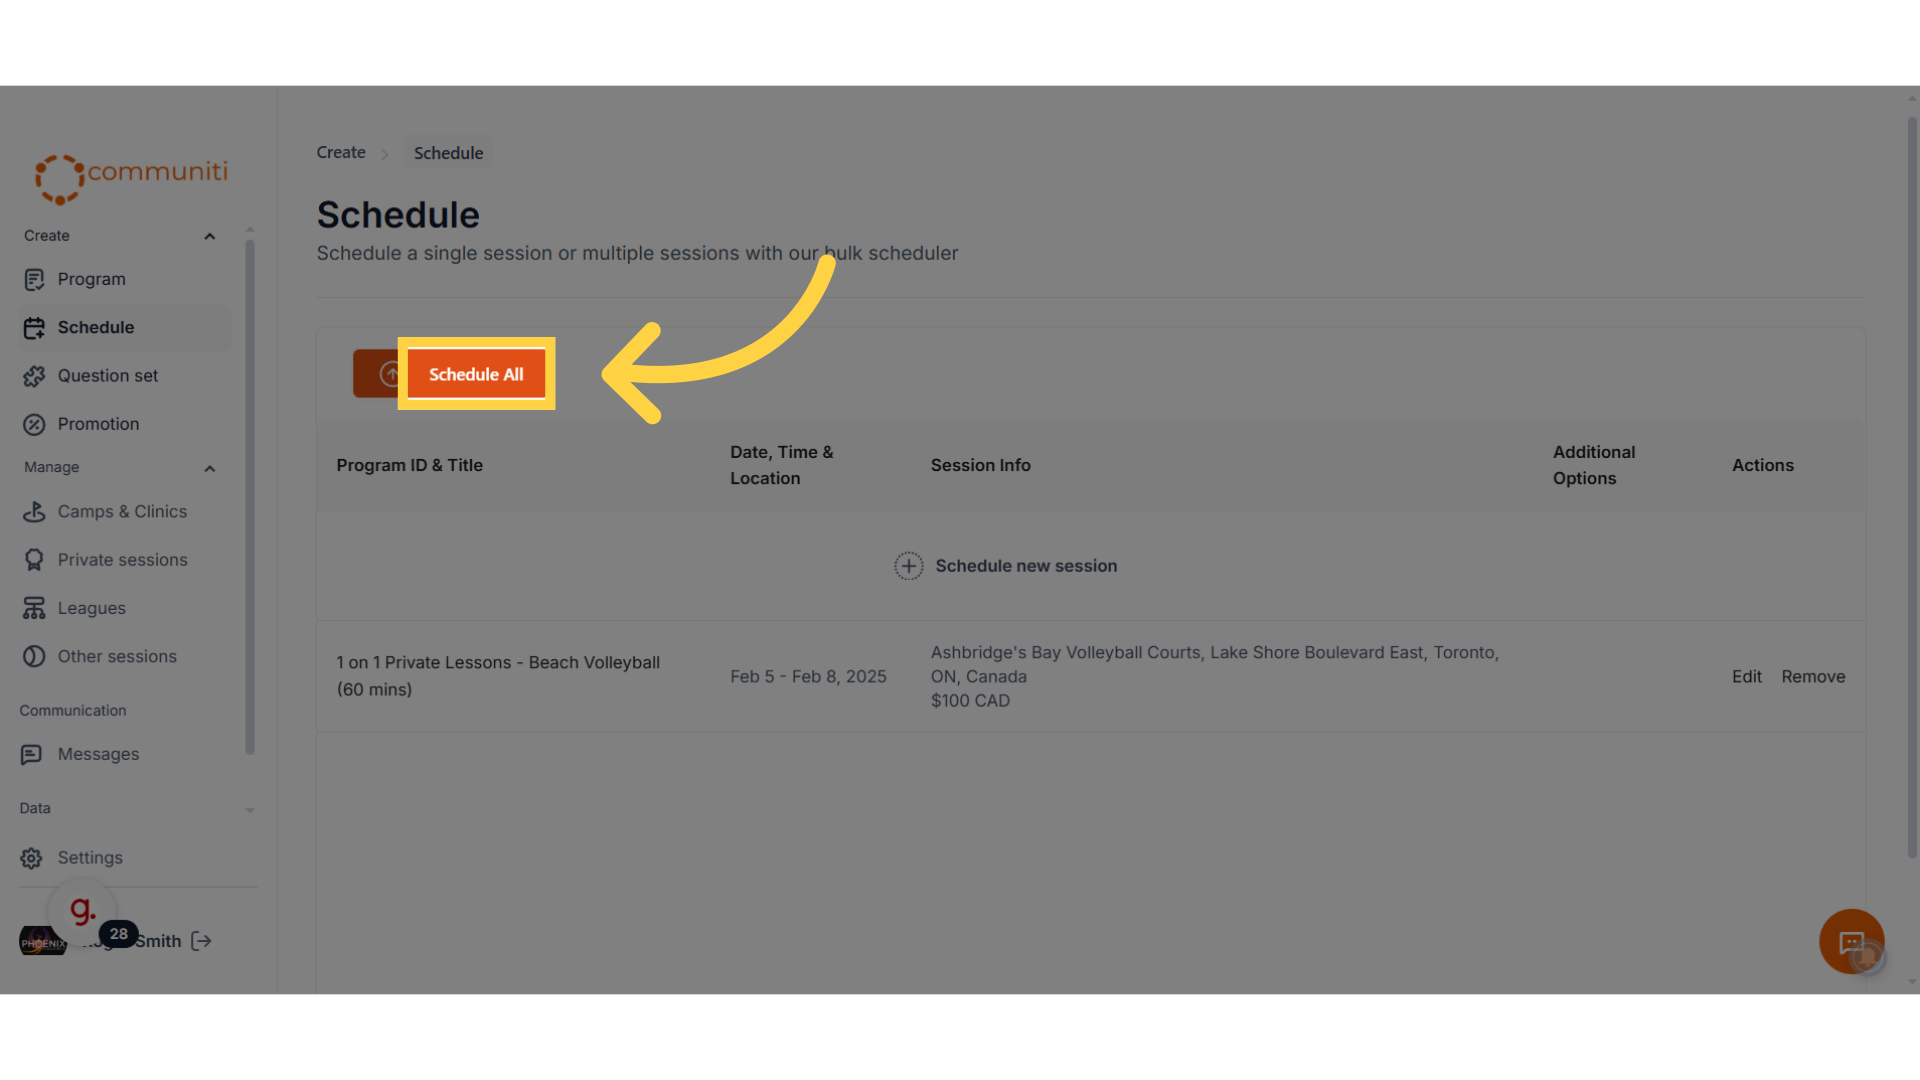
25. Once you're ready to make it Live, click "Schedule All"
Your private sessions are now live for people to book
The Private sessions are added to your booking page which can be accessed and shared though your booking handle here.